The internet loves a shortcut, and the most popular shortcut in this category is the 42-inch rule. It gets repeated so often that homeowners start treating it like a law.
It is not a law. It is a baseline.
The best height to mount tv on wall depends on how you sit, how far you watch, what size screen you own, what mount you picked, and whether that TV is part of a larger room design or a fully integrated smart home. A television that looks centered on the wall can still feel wrong within ten minutes of watching. A television that measures “correctly” on paper can still miss the mark if the mount offset was ignored or the room was designed around a fireplace instead of comfort.
That is why professional installers do not begin with a single number. We begin with the room, the seating, and the way the system will be used every day. In a living room, that means balancing comfort with clean sightlines. In a new build or custom home theater, it also means planning lighting, shade control, audio placement, network reliability, and control platforms like Josh.ai and Lutron around the screen from the start.
The 42-inch rule came from ergonomic research showing that the center of a TV positioned 42 inches from the floor aligns with the average seated eye level of adults on a standard sofa, and that standard became a North American baseline for TV mounting according to CE Pro’s explanation of the 42-inch standard.
That baseline is useful. It is also incomplete.
A TV does not float in an empty room. It lives above a console, across from a sectional, beside windows, under artwork, near speakers, and sometimes inside a room where the homeowner also wants hidden wiring, motorized shades, and voice control. If you mount every TV at the same center height without accounting for those variables, some of them will feel excellent and some will feel awkward.
The rule points you toward a key principle, which is comfortable sightlines for seated viewing. If your neck has to stay tilted up through an entire movie, the installation is wrong even if the wall looks balanced.
It also helps people avoid a common mistake. Many DIY installs place the screen too high because homeowners center it visually on the wall instead of centering it for the viewer.
It does not account for:
Before you pick a height, it also helps to confirm whether the screen is right for the room. This guide on choosing the right TV size is the smarter first step, because height only makes sense once size and seating are dialed in.
A number on its own does not create a comfortable room. The relationship between seat, screen, and sightline does.
Good TV placement is a mix of ergonomics and geometry. The wall matters less than the people using the room.
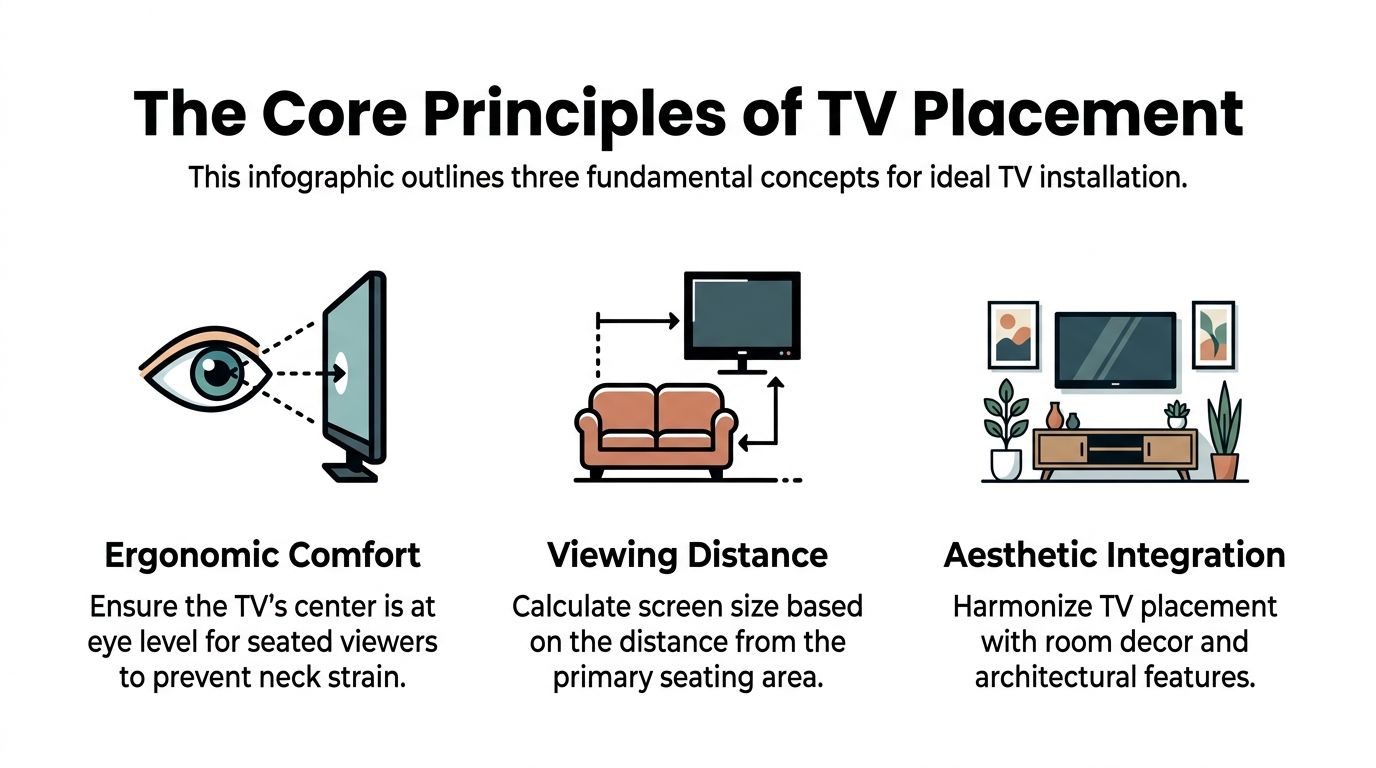
The center of the screen should work with the viewer’s natural line of sight. That is the principle behind the industry baseline. It is not about making the wall look symmetrical. It is about making long viewing sessions feel easy.
In practice, measure from the floor to your eyes while seated in your normal position. Do not sit taller than usual just because you are measuring. If you slouch into the corner cushion every night, measure that posture.
Kanto Mounts describes the preferred method this way: center the TV at seated eye level, then adjust for viewer position and mount offset. It also notes a calculation where EL + (VD × 0.22) can place the center of a 65-inch TV at approximately 60 inches, aligning the vertical gaze angle to an optimal 12 degrees downward for immersion without fatigue in that scenario, as outlined in Kanto’s TV height guide.
That point matters because comfort is not only about straight-ahead eye level. Distance changes the angle. A farther seating position can support a somewhat higher center point than a close one.
Screen size and seating distance should be planned together. A lot of mounting problems begin earlier, when a TV is chosen because it “fits the wall” instead of fitting the room.
For a useful design perspective on optimal TV positioning, Critelli Furniture offers a helpful room-planning resource that reinforces the idea that placement has to work with furniture layout, not against it.
The baseline guidance below comes from the verified distance recommendations tied to the 42-inch framework.
| TV Screen Size (Diagonal) | Recommended Viewing Distance (THX Guideline) |
|---|---|
| 55-inch | 7 to 11.5 feet |
| 65-inch | 8 to 13.5 feet |
| 75-inch | 9.5 to 15.5 feet |
A professionally planned TV wall also supports the rest of the room:
If you are looking at the wall and trying to reverse-engineer all of this after the fact, the process gets harder. This practical guide on how to mount a TV on wall helps frame the physical side of the job, but the placement decision should come before the drill comes out.
Good TV height comes from measurement, not folklore. The screen has to match how the room is used, and in a well-planned home that decision also affects lighting control, audio layout, automation scenes, and where the wiring lives behind the wall.
Start in the primary seat. Sit the way you normally watch, not the way you sit when guests come over.
Measure from the finished floor to your eyes. As noted earlier, seated eye height often falls in a common range, but the useful number is your eye level in your furniture, with your posture. Write that down as EL, or eye level.
Measure from that same seat to the TV wall. Kanto’s method uses viewing distance equal to TV screen width × 1.67, with a 65-inch TV and roughly 57-inch screen width producing a viewing distance of about 95 inches.
That becomes VD, or viewing distance.
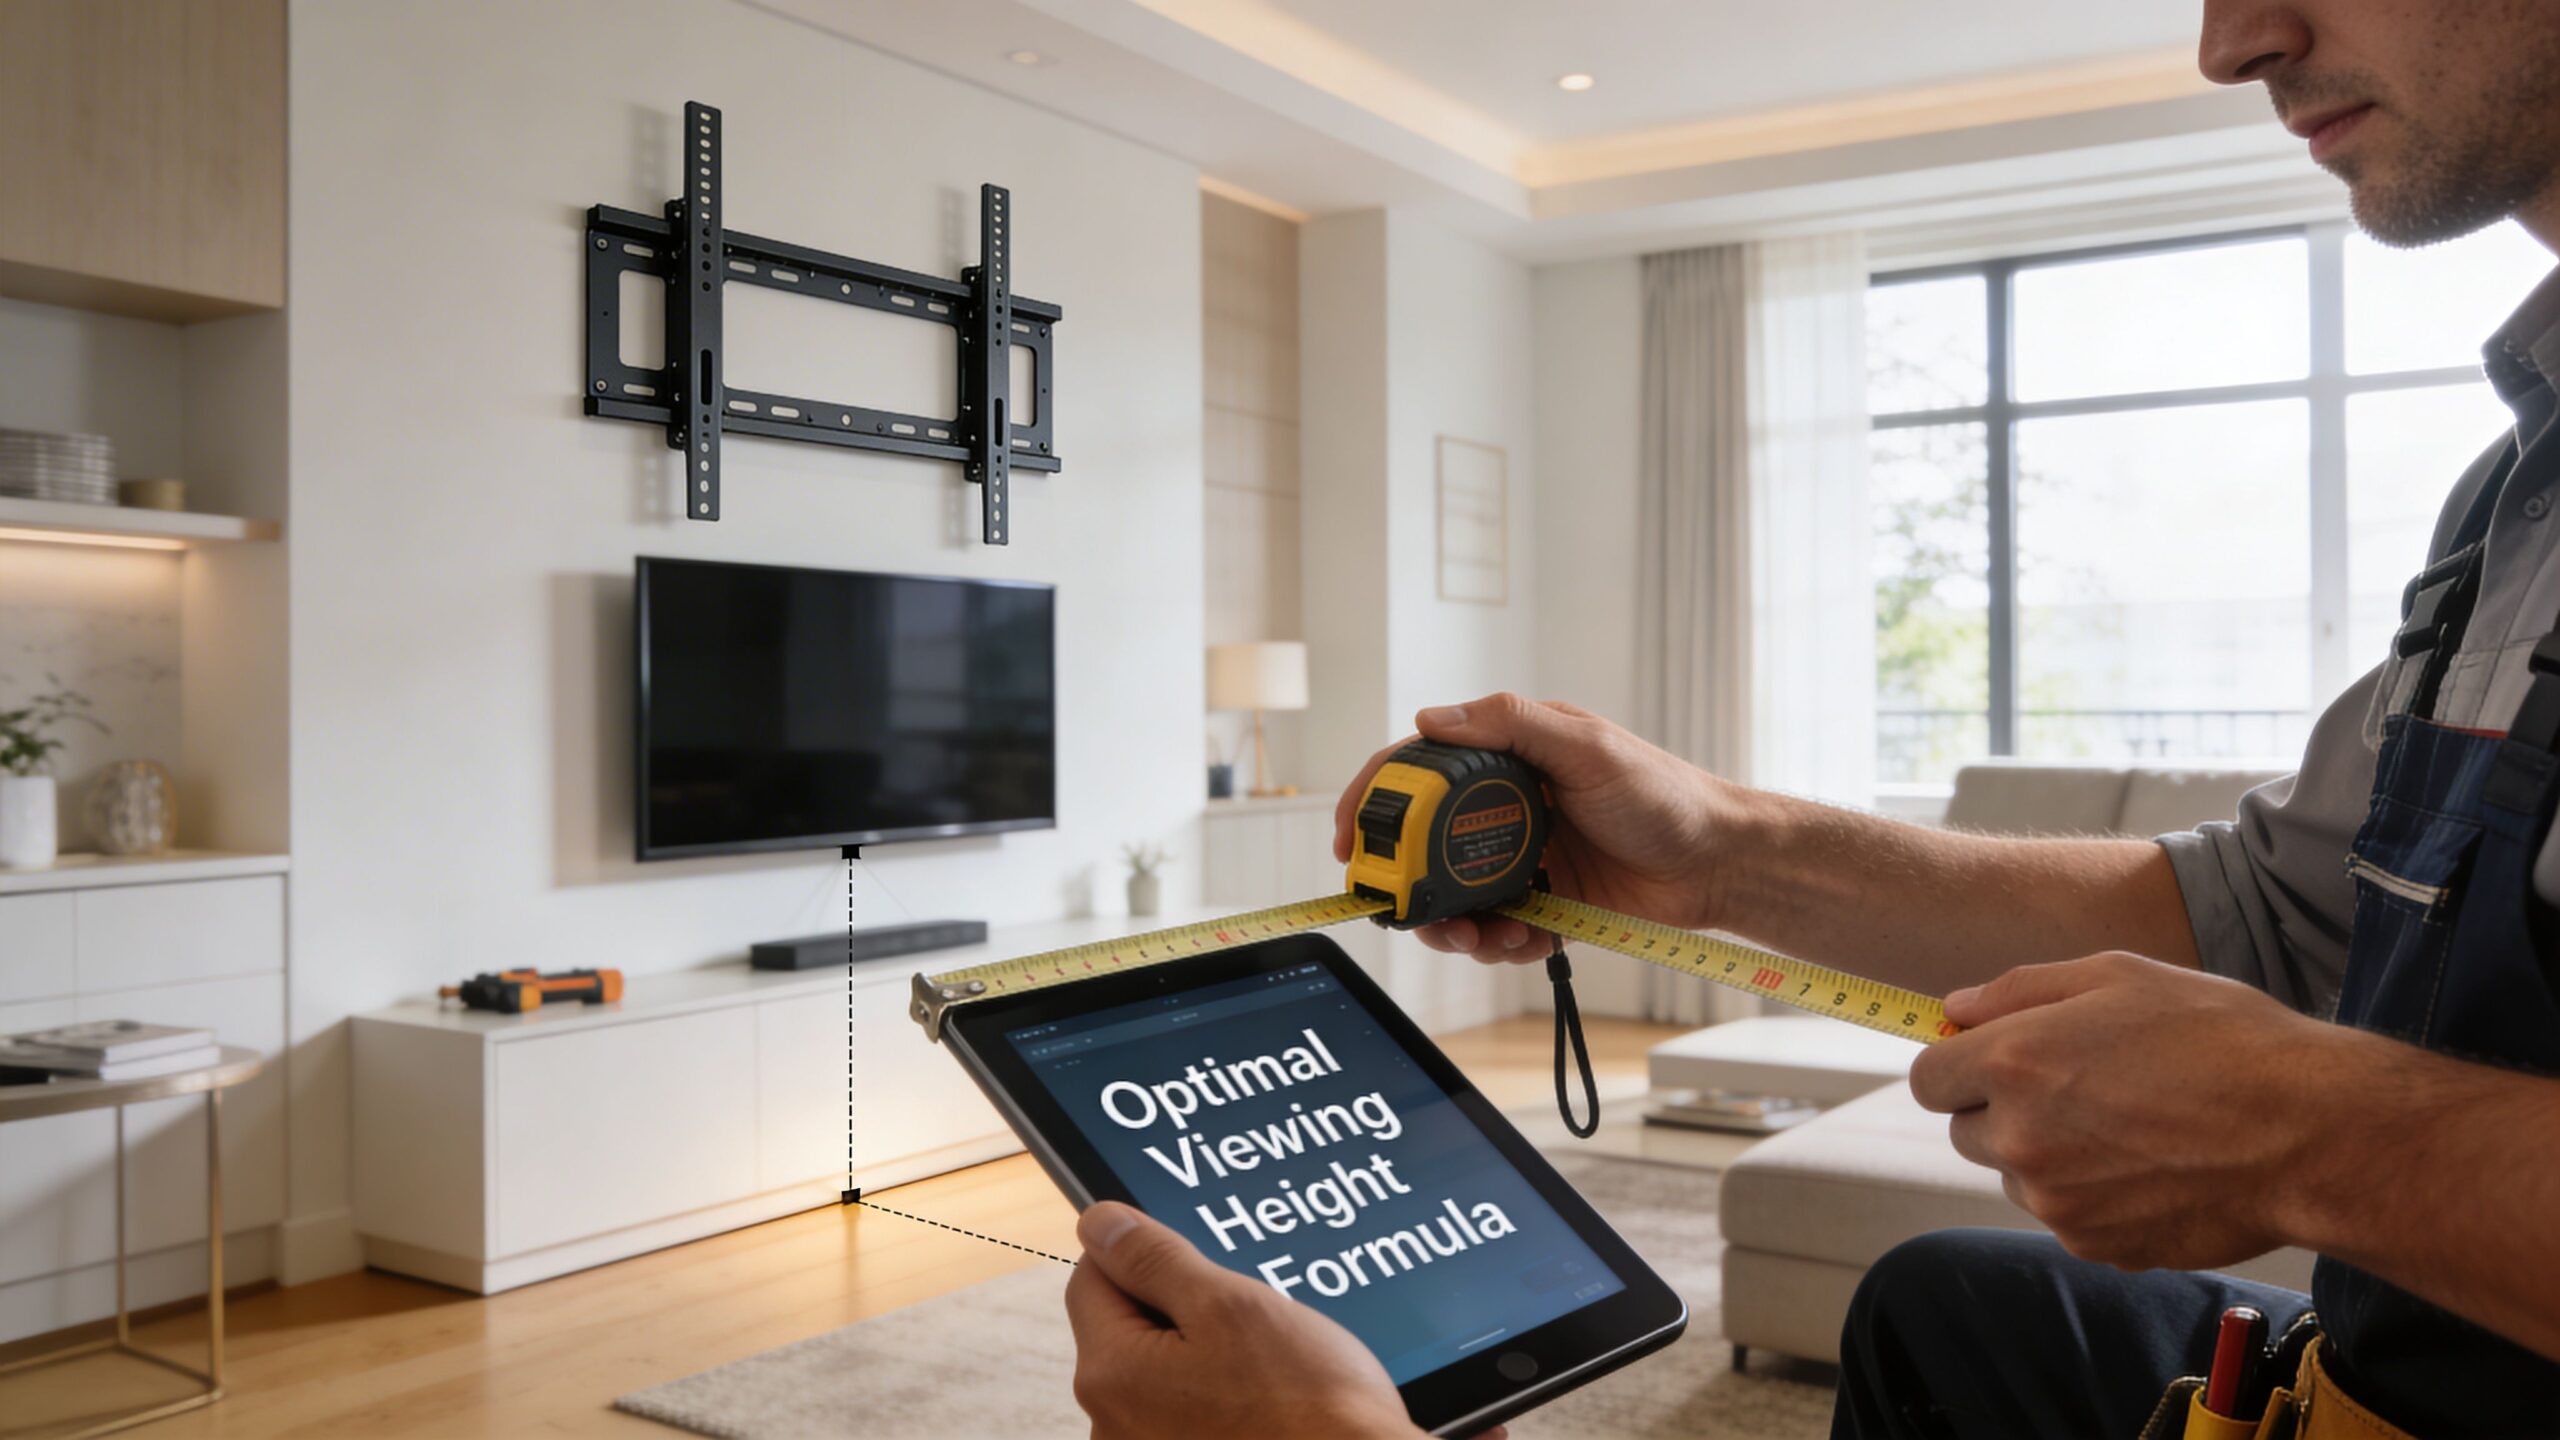
Use the formula:
TV center height = EL + (VD × 0.22)
With a 65-inch TV, that calculation can place the screen center at about 60 inches, creating a 12 degree downward viewing angle. That is a comfortable target in many living rooms because it balances neck posture with a more immersive line of sight.
DIY installs often stop at eye level alone. Distance changes the result, especially as screens get larger.
A TV can be technically centered on the wall and still feel wrong from the sofa.
Now measure the display, not the mount. Take the full height of the panel, divide it by two, and mark the true center of the screen.
Then match that center point to the wall mark from your formula. This identifies the true center of the display, which is different from the bracket mounting points.
That difference is where a lot of home installs drift off by an inch or two.
Mount geometry matters. Kanto notes that some tilting full-motion mounts can introduce a -1 inch vertical offset, which is enough to throw off a carefully planned result once the TV is hanging.
Before drilling, I check five things:
In dedicated media spaces, these choices affect more than comfort. A home theater room dimensions calculator helps sort out how seating distance, screen size, and speaker positions work together before the wall is finished and the rack is wired.
Here is a visual that helps with the measuring process before you commit to holes in the wall:
Mock it up first. Painter's tape works. Cardboard works better if you want the full visual weight of the panel.
Then use the room. Sit down at night with the lamps on. Watch in daylight with the shades open. Walk in from the kitchen and check the sightline from the side. If the system includes a Sonos soundbar, in-wall speakers, or a cabinet below, mark those too.
This quick test catches problems before the first anchor goes in.
A TV wall is rarely just a TV wall. In a connected home, it becomes the reference point for the rest of the room.
If motorized Lutron shades are part of the plan, screen height and placement should avoid the worst glare path before the programming starts. If Josh.ai will trigger a movie scene, the screen location has to work with lighting zones, speaker aiming, seating sightlines, and equipment control. If sources live in a remote rack, proper height also helps with clean wire paths, service access, and a finished look that still works five years from now when the rest of the system evolves.
The formula gets you to a smart starting point. The professional result comes from checking how that height performs inside the whole room.
Standard living rooms are the easy jobs. Real houses are rarely standard.
A bedroom TV behaves differently from a family-room TV. A fireplace wall forces trade-offs. A kitchen TV may be watched while standing. The best height to mount tv on wall changes because the posture changes.
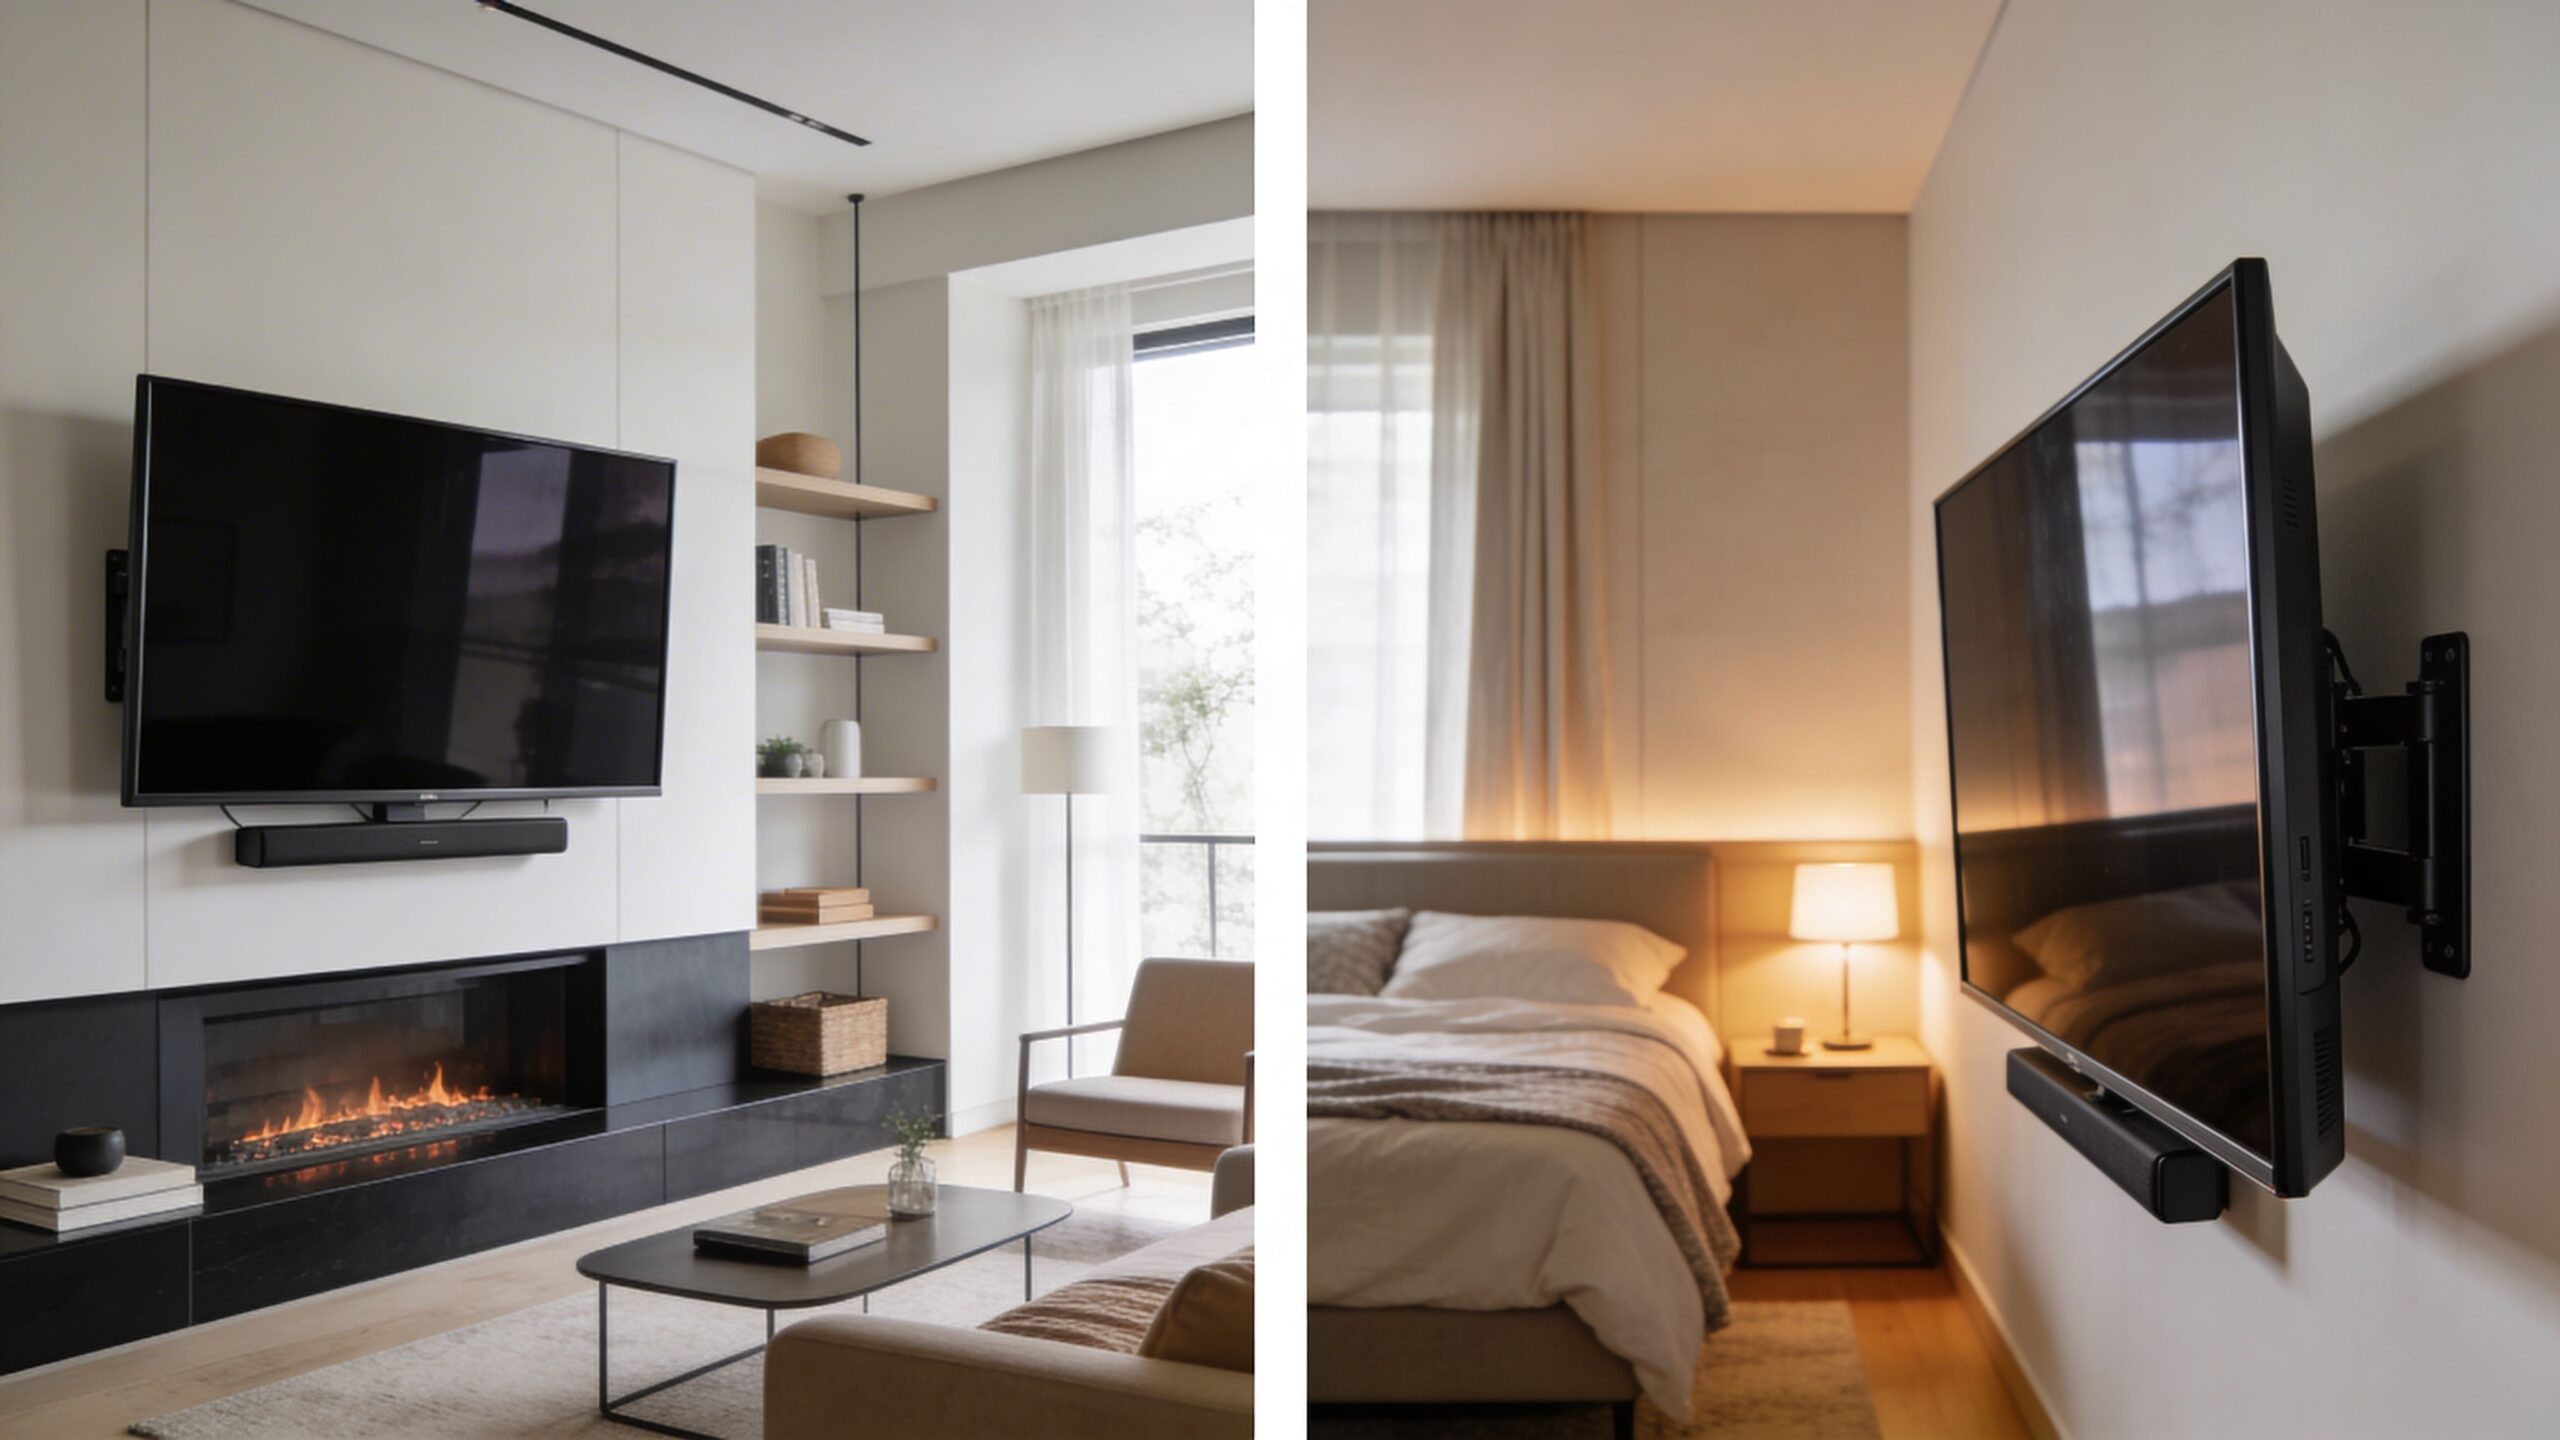
In a bedroom, viewers are usually more reclined. The screen often needs to sit higher than it would in a living room, but that does not mean “as high as possible.”
A tilting mount does a lot of work here. It lets the TV sit at a practical height on the wall while still aiming the image toward the bed instead of over your forehead. Without tilt, bedroom TVs often feel awkward because the screen angle fights the way people rest.
In bedrooms, comfort comes more from the viewing angle than from following a living-room formula.
A TV above a fireplace almost always pushes the screen higher than ideal. That does not make it impossible. It makes the mount choice and final angle more important.
If the architecture leaves no better location, use a mount that can bring the screen down or tilt it properly for viewing. This is one of those moments where “looks good in a photo” and “feels good for two hours” are not the same thing.
I would always rather solve a fireplace wall directly than pretend it is ergonomic just because it is popular.
A kitchen TV is often watched while standing, moving, or sitting at a counter stool. A basement bar or lounge can work the same way.
In those rooms, you are not chasing the same seated eye line you would use in a living room. You are balancing visibility across more than one posture. That usually leads to a slightly higher placement, often paired with a mount that gives angle flexibility.
The same logic carries outside. A patio display, outdoor sound zone, or covered porch TV has to work with standing guests, sunlight, and ambient lighting. If the property also includes Oelo exterior lighting or integrated outdoor audio, the TV becomes part of a broader entertainment layout instead of a standalone screen.
Multi-generational households expose the weakness of one-size-fits-all advice. Adults, children, and seniors do not all watch from the same eye height.
TaskRabbit notes this challenge directly and says that while standard guides focus on a 42-inch center height for adults, CEDIA pros suggest adjustable tilting mounts raised 4 to 6 inches higher with a 15° downward tilt to comfortably serve 80% of users without causing neck strain in these mixed-use homes, according to its discussion of multi-generational TV mounting compromises.
That recommendation tracks with what works in the field. In shared spaces, flexibility beats rigidity.
If the room serves movie nights, casual sports viewing, and everyday family traffic, the right answer is usually a thoughtful compromise, not a textbook number.
A well-mounted TV should disappear into the room when it is off and command the room when it is on. Height is part of that. Integration is what finishes the job.
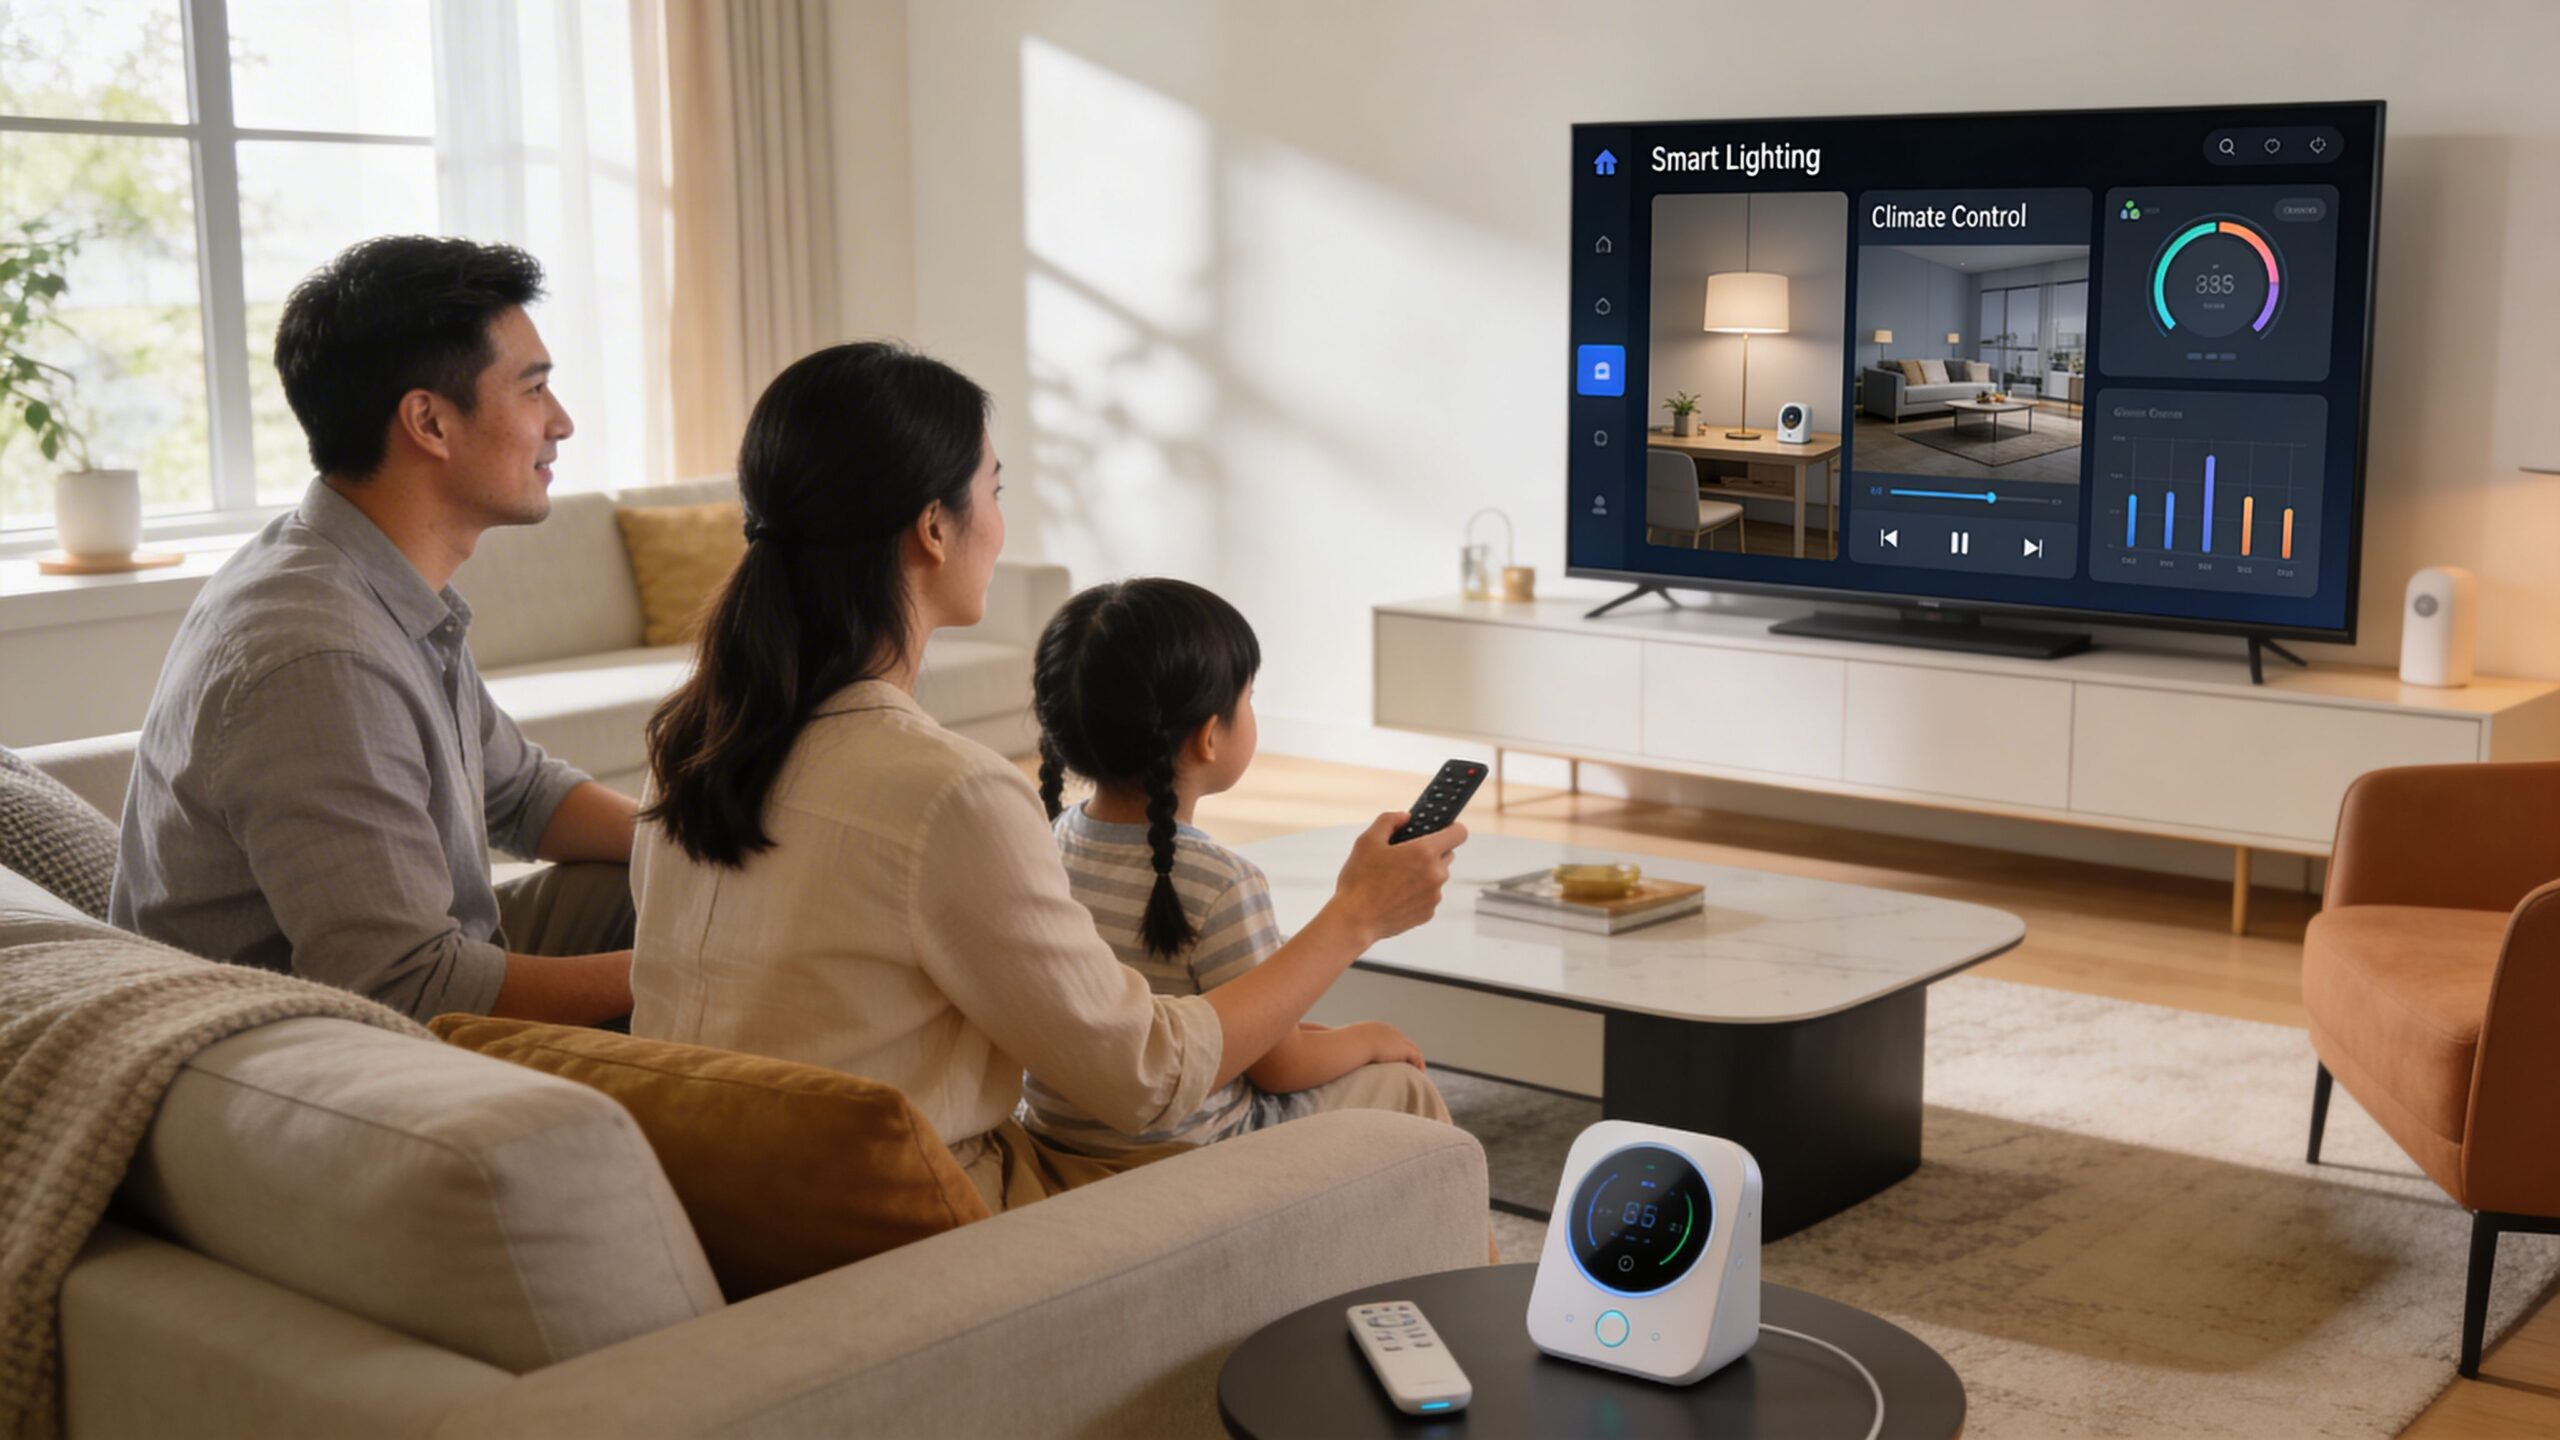
When the screen sits in the right place, the rest of the system can be designed around it cleanly. That can include:
The difference is convenience. A homeowner should not have to think through five separate devices just to watch a show.
The cleanest smart home rooms are planned backward from the experience. Say “movie night,” and the TV turns on, the source selects correctly, the lights dim, the shades lower, and the audio system switches to the right mode.
That works best when the display was mounted with wiring, equipment placement, and user flow in mind from day one. If the TV ended up too high, too close to a window, or too far from the audio centerline, even great products feel less polished.
A properly designed room also grows better. The same planning mindset applies whether the project is a family room refresh, a custom home theater, a new home build, whole-home audio, restaurant AV, or outdoor lighting and sound. The screen is often the visual anchor, but the network, control, and lighting layers are what make the room feel effortless.
For homeowners thinking beyond a simple bracket install, this overview of home entertainment automation shows how the TV wall can become part of a more seamless system.
The best TV wall does not just hold a display. It organizes the entire entertainment experience around ease of use.
Most bad TV installs come from the same handful of mistakes. The bracket goes up fine, but the room never feels right afterward.
Use the main seat as your reference point. Tape the outline on the wall before drilling. Confirm the bracket geometry. Plan for the source devices, audio, and cable path while you still have options.
If the wall is straightforward and the room is simple, many homeowners can handle the job well. But some situations deserve professional help immediately.
A professional installer is worth it when:
That last point gets overlooked. Plenty of DIY jobs hold the TV securely. Far fewer look intentional once the furniture, speakers, and lighting are all in place.
A good install should feel easy every day after it is done. No neck strain. No cable mess. No second-guessing the height every time you sit down.
If you want the best height to mount tv on wall figured out for your room, not just a generic number, Home AV Pros can help. They provide free in-home consultations for homeowners across southern Wisconsin and nearby northern Illinois, with clean professional TV mounting, smart home automation, custom home theater design, new home build planning, home audio, outdoor lighting and sound, and commercial AV support for spaces like restaurants. If you want the screen, sound, lighting, and control system to work together the first time, schedule a consultation and get the room done right.

Copyright © 2026. Home AV pros. All rights reserved.