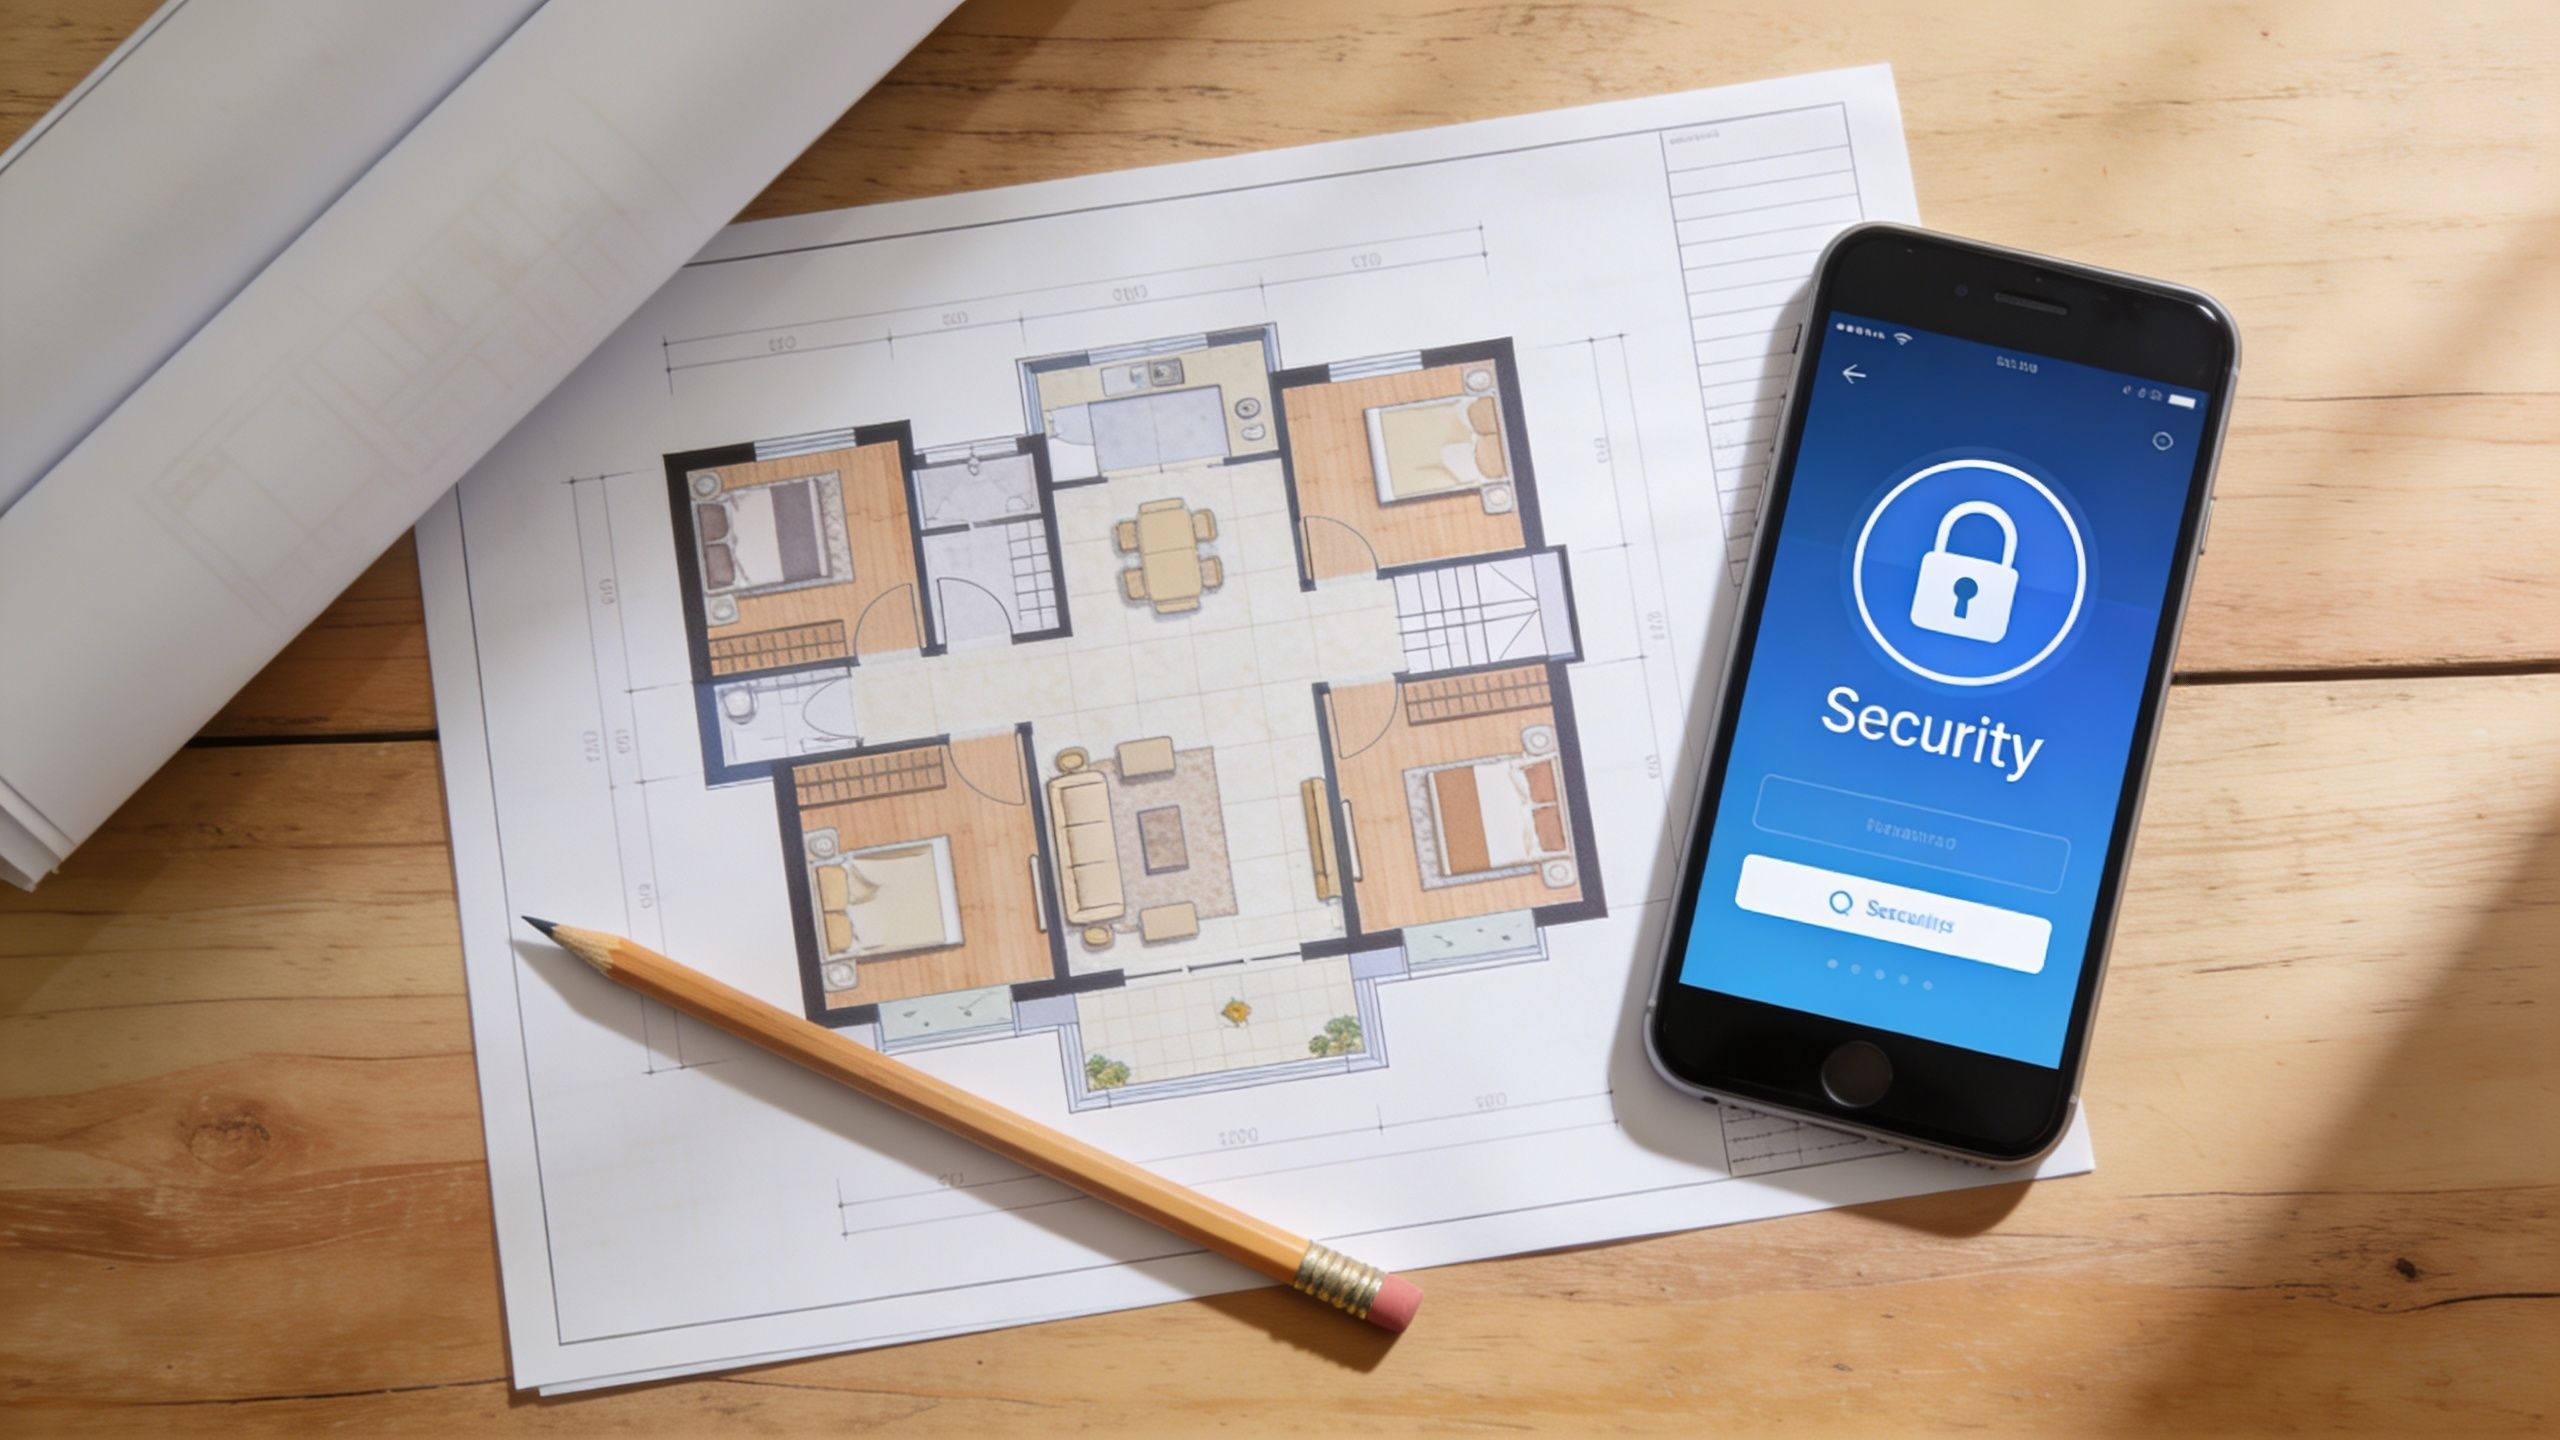
You're probably in the same spot a lot of homeowners hit. You want cameras up before the next package delivery, you've seen plenty of “easy setup” promises, and you'd rather not wait around for an installer if the job looks manageable.
That instinct makes sense. Self install security cameras have gone mainstream because the gear is easier to buy, the apps are better, and people want control over their own systems. But the clean installs that hold up over time usually come from good planning, solid networking, and realistic expectations about where DIY works well and where it starts to break down.
A camera isn't just a camera anymore. In a strong smart home, it can trigger lighting, hand video off to a display, work with voice control, and fit into the same ecosystem as Lutron shades, Josh.ai, Sonos audio, outdoor lighting, and a reliable network backbone. If you approach the project that way from day one, the end result feels less like a gadget and more like part of the house.
DIY has clearly moved into the mainstream. In 2026, 49% of system users installed their own security systems, surpassing professional installations for the first time, according to SafeHome's home security industry annual report. That shift makes sense. Homeowners want to avoid contracts, skip technician scheduling, and get a system running on their own timeline.
What usually causes trouble isn't the mounting itself. It's buying cameras first and asking placement, power, and network questions later. Before you touch a drill, walk the property the same way someone trying to get in would.
Think in terms of events, not devices. Ask yourself what you actually need footage to show.
That exercise usually reveals that fewer well-placed cameras beat a box full of random ones.
Practical rule: If you can't say what a camera is supposed to capture, you're not ready to mount it.
A camera setup works better when it fits the rest of the home. If you already use smart lighting, voice control, or distributed audio, think ahead. A motion event at night could eventually trigger exterior lighting. A front door alert could show up on a living room display. A voice command through Josh.ai could pull up the driveway feed without opening a phone.
That doesn't mean you need a full automation build right now. It means you should avoid painting yourself into a corner with isolated gear that won't integrate cleanly later.
A simple planning sketch helps. Mark doors, garage openings, vulnerable ground-floor windows, your router location, and likely cable paths. Then note where power is easy, where Wi-Fi may struggle, and which views matter most during the day and at night.
Different goals need different systems.
| Priority | What to optimize for |
|---|---|
| Porch protection | Clear face capture near the front door |
| Family awareness | Reliable alerts and easy app access |
| Evidence quality | Better placement, better lens choice, stable recording |
| Smart home integration | Compatibility with automation, networking, and control platforms |
| Low maintenance | Wired power, local recording, cleaner long-term reliability |
If you're weighing budget against long-term performance, a good reality check is to compare DIY costs and trade-offs against a professional camera installation cost breakdown. Even if you stay DIY, it helps to know where the labor goes and why some systems perform better over time.
A lot of bad installs start with a camera bundle that looked great online. The right hardware depends on where the camera lives, how you'll power it, what you need to identify, and whether the system needs to grow into a larger smart home later.
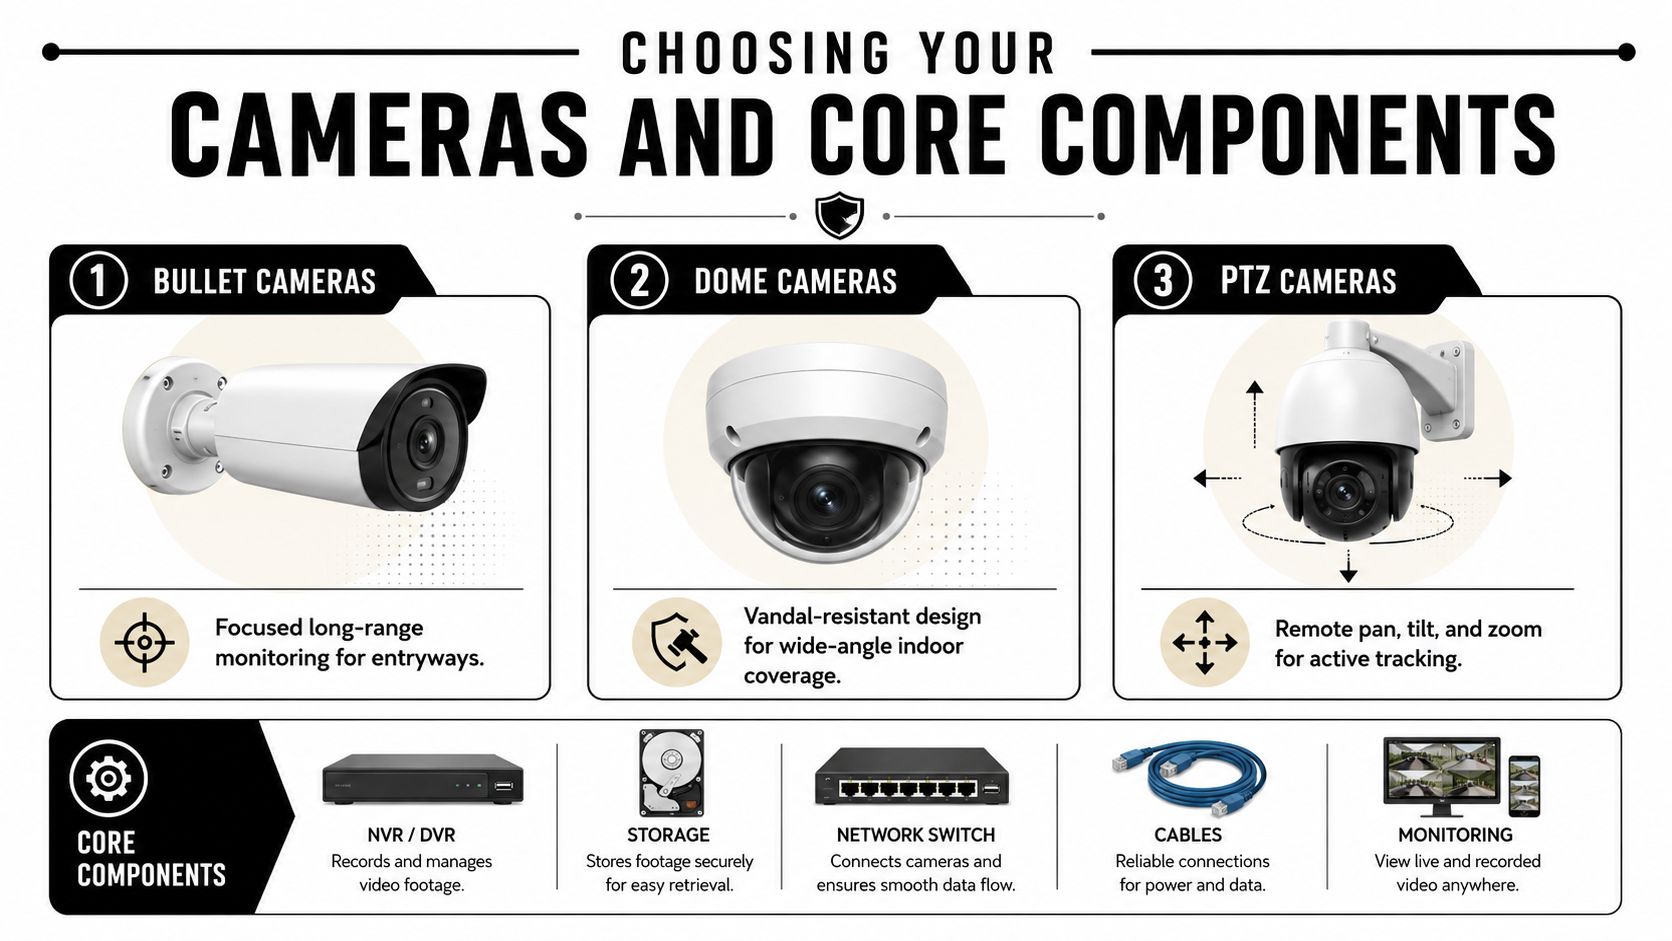
Bullet, dome, turret, and PTZ cameras all solve different problems.
If you're comparing options for a detached garage, patio, or driveway edge, a guide to wireless outdoor camera choices can help narrow down which style makes sense before you commit.
Battery cameras are attractive because they're fast to deploy. They're useful where cabling is difficult, where you rent, or where you need a temporary setup. They also ask more from the homeowner over time. You'll manage charging, wake-up behavior, and occasional misses tied to power-saving design.
PoE cameras are usually the better long-term answer when reliability matters. One cable carries power and data, so you don't depend on batteries or nearby outlets. PoE also plays better with NVR-based recording, structured networking, and expansion.
Here's the trade-off in plain terms:
| Option | Where it shines | Where it falls short |
|---|---|---|
| Battery wireless | Fast setup, minimal drilling, flexible placement | More maintenance, less ideal for critical zones |
| Plug-in Wi-Fi | Easy for indoor or covered spaces | Still depends on outlet access and wireless stability |
| PoE wired | Stable power, stable data, strong for multi-camera systems | More work up front, cable routing matters |
Use battery cameras for convenience. Use PoE when you need a camera to behave like infrastructure.
Cloud storage is simple. The app usually feels polished, remote access is straightforward, and setup is beginner-friendly. The trade-off is ongoing subscription cost, internet dependence, and less control over how the system stores footage.
Local recording with an NVR gives you more control and often a better fit for homes that take networking seriously. It pairs especially well with a solid backbone such as Ubiquiti, where cameras, switching, and storage can live in the same ecosystem. That's often the cleaner path when the camera system is part of a larger home with automation, dedicated Wi-Fi design, and whole-home AV.
If you also manage a mixed-use property or a small office, this roundup of best security camera systems for small businesses is worth reviewing because it highlights system-level thinking that applies at home too, especially around uptime and recording strategy.
One of the most common DIY mistakes is buying the widest lens available and assuming more coverage means better security. That's often backward.
A 90° lens can improve facial identification at 40 feet by 35%, and 22% of DIY footage submitted to police is ineffective because wider angles can create distorted, unusable footage, according to Backstreet Surveillance's camera placement guide.
That's why a front porch camera and a driveway overview camera shouldn't automatically use the same lens. For identification, tighter framing usually wins. For awareness, wider framing can help. Good systems mix both on purpose.
Placement does the heavy lifting. A modest system with smart positioning will outperform a larger system mounted too high, aimed too wide, or pointed into glare.
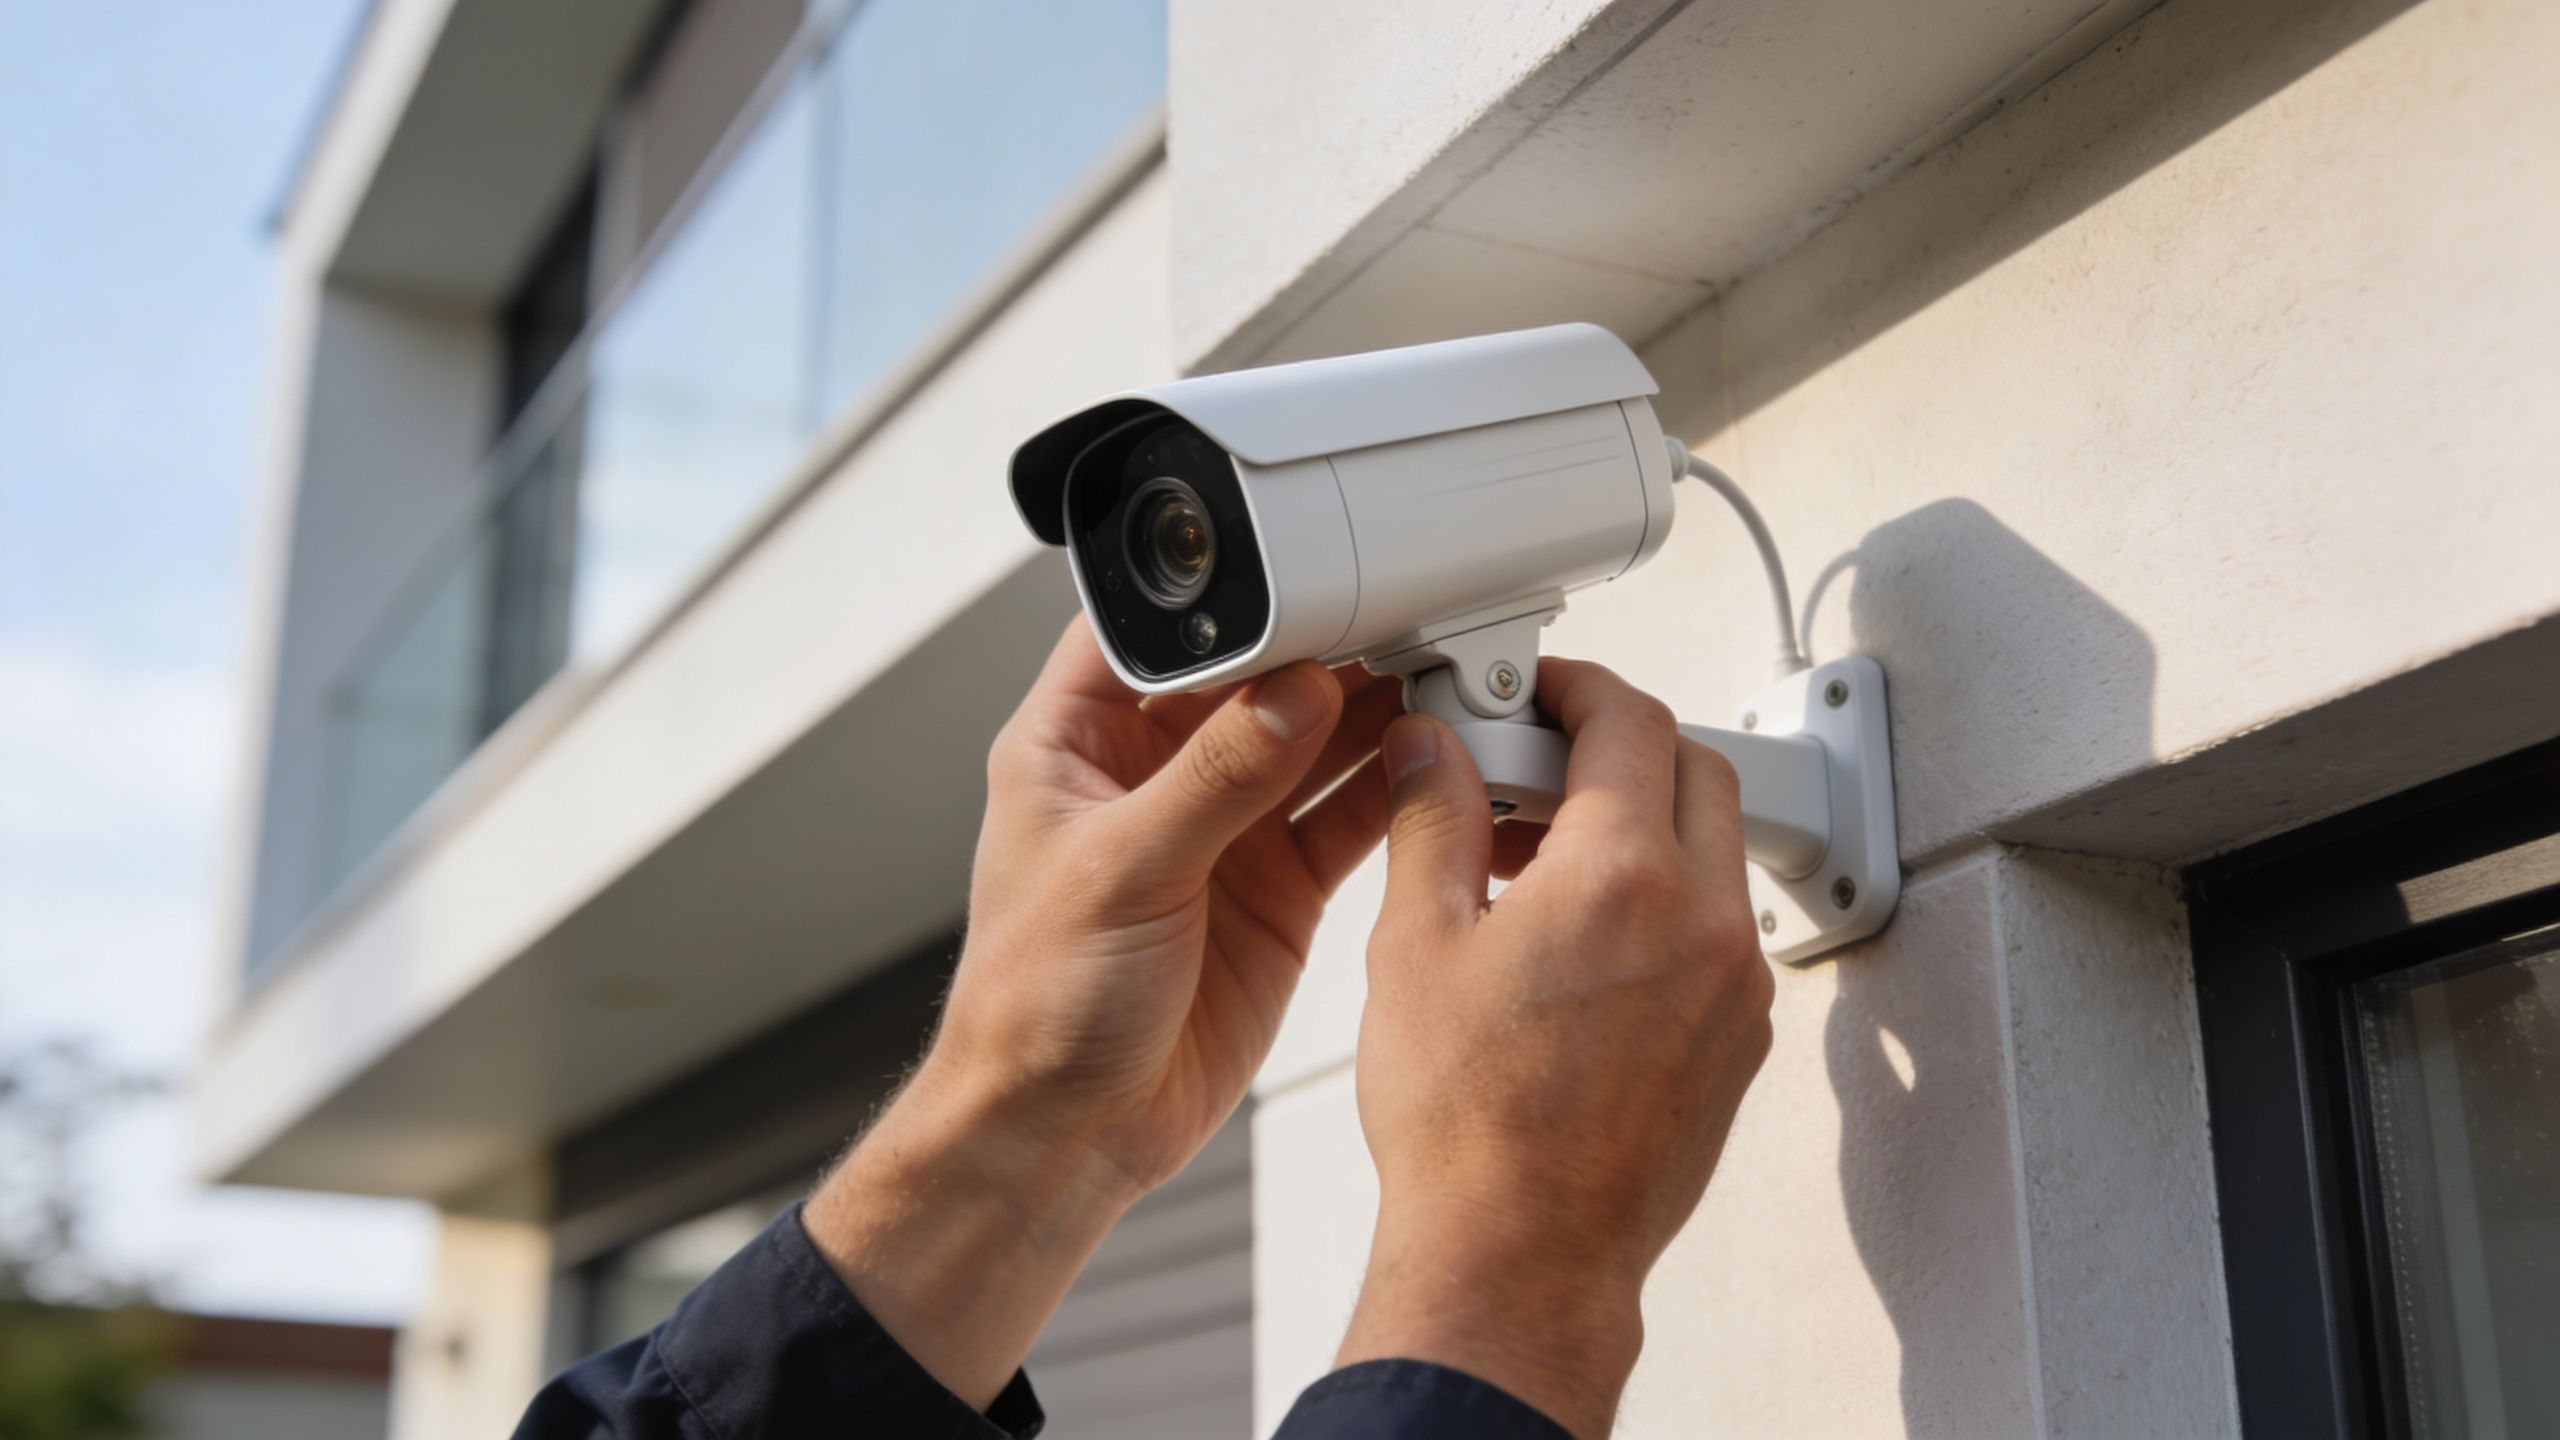
For optimal results, mount cameras 8 to 10 feet high and tilt them 15 to 30 degrees downward, according to The Alarm Masters installation guide. That placement helps deter tampering and aligns with the reality that 78% of break-ins occur at ground-level entries in the same source.
Don't start with the eaves just because they're easy to reach. Start with the entry path.
A practical residential priority list usually looks like this:
Front door and porch
Capture the approach and the threshold. If your camera only sees the top of a hat, it's too high or tilted poorly.
Back door or patio door
These doors are often quieter, darker, and less visible from the street.
Garage and driveway
For this area, you usually want a broader scene camera, sometimes paired with a tighter shot if identification matters.
Ground-floor side access
Fence gates, narrow side yards, and basement walkouts deserve more attention than most DIY plans give them.
Interior transition points
A foyer, mudroom, or hall can be useful if someone enters, but indoor cameras require thoughtful privacy settings.
The install goes smoother when you match your tools to the house.
A digital level helps more than people think. So does painter's tape for mock placement before you drill. If you're working through cable planning and mount locations at the same time, a practical walkthrough on how CCTV camera installation works can help you think through routing before holes start multiplying.
Mount for faces, not for roofs, lawns, or the top of a delivery truck.
Before you lock anything down, hold the camera in place and preview the image in the app or on a temporary monitor. Look for four common problems:
At this point, many homeowners realize a perfect-looking mount point isn't a perfect camera angle.
A quick visual walkthrough can help if you want to see the physical process in action.
A camera can improve security without making the home look patched together. Keep wiring tight, use junction boxes where appropriate, and avoid leaving service loops hanging in plain view. If the run is exposed, make it neat. If the mount lands near trim lines or lighting fixtures, align it with the architecture.
That matters even more on homes that already have thoughtful design elements like outdoor lighting, automated shades, or clean exterior finishes. Security gear should fit the house, not fight it.
A good DIY install often comes down to restraint. Fewer cameras, better placed, with cleaner routing and better angles, will usually beat a scattered system every time.
Most camera frustration isn't caused by the camera. It's caused by the network.
People assume a strong phone signal means a camera will be fine in the same spot. That's not a safe assumption, especially once multiple streams, motion events, and remote viewing hit the network at the same time.

Up to 40% of DIY security camera failures are due to unreliable Wi-Fi connectivity, especially in homes over 1,500 square feet, according to Gen Security's placement guide. The same source notes that for critical locations beyond 50 feet from the router, wired PoE or a strong mesh network such as Eero is essential.
Walk to each planned camera location with your phone and check consistency, not just whether it connects. Garages, second floors, exterior corners, and doorbell locations often look fine until the wall materials, appliances, and neighboring wireless traffic get involved.
For self install security cameras, this is the practical order:
Mesh systems help in homes where a single router can't cover everything cleanly. Eero is a solid example for homeowners who want easier management and more even coverage without turning networking into a hobby. Mesh can be a smart fix for phones, tablets, TVs, Sonos speakers, and some cameras.
PoE still wins for the cameras you most depend on. The garage, second-floor exterior, detached structure, and long driveway edge are often better off wired. That's especially true if your home already has a larger smart home footprint with devices competing for wireless airtime.
Here's the simple decision table:
| Situation | Better fit |
|---|---|
| Small home, one or two non-critical cameras | Wi-Fi may be enough |
| Multi-story home with several cameras | Mesh becomes much more important |
| Exterior camera far from router | PoE is often the safer choice |
| New build or renovation | Prewire now and thank yourself later |
| Smart home with lighting, voice, and AV integrations | Strong structured networking matters more |
If a camera protects the place someone is most likely to enter, don't make that camera depend on weak Wi-Fi.
A good security system depends on the backbone behind it. That's where networking platforms like Ubiquiti stand out. They're not just about internet access. They make it easier to build a stable environment for cameras, streaming, automation, and remote access to coexist without stepping on each other.
If your project is moving toward hardwired infrastructure, especially in a remodel or new build, it helps to review what proper low-voltage work looks like. This article on choosing a licensed Brisbane data cabler is geographically specific, but the principles around neat cable runs, standards, and long-term reliability still apply.
For homeowners weighing wired options, understanding what a PoE security camera is makes the decision much easier. Once people see that one cable can handle both power and data, a lot of the design choices become clearer.
A camera system isn't finished when the image appears in the app. That's just the first checkpoint. The essential work is verifying that the system records the right events, sees clearly at night, and fits into the rest of the home in a way that is genuinely useful.
Structured post-installation testing boosts system reliability to 94%, according to Security Camera King's DIY installation guidance. The same source notes that coverage gaps account for 52% of failures, which is why testing matters more than most DIY guides admit.
Open the live view, yes. Then do more than that.
If a camera gives you ten notifications a night for blowing branches, the system is training you to ignore it. That's not security. That's noise.
Standalone alerts get old fast. Integrated response is where cameras start to feel worth the effort.
A few examples that work well in real homes:
The best camera alert is often the one that triggers the right action before you even reach for your phone.
This is also where DIY starts to split into two tracks. If you want a few dependable notifications and recorded clips, many homeowners can get there on their own. If you want coordinated lighting, voice control, display routing, strong networking, and clean whole-home behavior, the project starts looking more like integration than installation.
A smart home should reduce friction, not create more menus. Keep your camera names clear. Group views logically. Use routines people in the house will remember. “Driveway,” “Front Door,” and “Back Patio” beat whatever default labels came from the app.
That same simplicity matters if the home already includes whole-home audio, theater spaces, automated shades, or distributed control. Security should fit naturally into the daily experience, not feel like a separate app that only one person understands.
After you install the cameras, the work moves to maintenance and oversight. Clean the lenses, confirm that notifications remain active, review stored footage, and keep the firmware current. A neglected camera can stay mounted for months while becoming less useful.
Privacy matters too. Aim cameras at your property and your access points, not into a neighbor's windows or private outdoor living areas. If your system includes app access, user permissions, or cloud accounts, basic cyber hygiene matters just as much as physical placement. Homeowners who want a plain-English overview of account risk and understanding data breach prevention should treat that side of security seriously too.
DIY makes sense for many homes. It stops making sense when the house is large, the networking is complex, the finish quality needs to be flawless, or the security system needs to tie into Lutron, Josh.ai, Sonos, Kaleidescape, Ubiquiti, and exterior lighting as one coordinated experience. The same goes for new home builds, restaurants, custom home theaters, whole-home audio projects, and integrated outdoor lighting and sound systems where planning early saves a lot of rework later.
If you want a system that goes beyond basic DIY and works as part of a complete smart home, Home AV Pros can help design and install a cleaner, more reliable solution for your home. From security cameras and networking to Lutron lighting, Josh.ai control, Sonos audio, custom home theaters, new home builds, restaurants, and outdoor lighting and sound, their team builds systems that look right, operate easily, and hold up over time.

Copyright © 2026. Home AV pros. All rights reserved.