Most homeowners start the same way. They notice the yard disappears after sunset, the front walk feels dim, and the patio they enjoy all summer becomes unused at night. Then they shop fixtures first, buy a mixed box of path lights and spots, and hope brightness will solve the problem.
It usually doesn't.
Good outdoor lighting comes from design, not from owning more fixtures. When you approach how to design outdoor lighting as part of a smart home, the result changes completely. The yard feels intentional, the architecture reads clearly after dark, pathways are easy to traverse, and the lighting responds the same way the rest of the house does. One command can shift the property from everyday evening mode to entertaining, arrival, or late-night security.
At Home AV Pros, we see this most often in residential projects, especially new home builds and outdoor living upgrades. The same integration mindset that works in custom home theater, whole-home audio, networking, and automation also applies outside. Outdoor lighting works better when it's treated as part of the home system, not as an isolated add-on.
A strong plan starts with how you want the property to feel at night.
One homeowner wants the front elevation to look refined from the street, with soft highlights on stonework and trees. Another cares more about safe movement from the driveway to the front door. Someone else wants the backyard to function like an outdoor room, with comfortable light near seating, subtle glow along steps, and a few dramatic accents in the outdoor space. Those are different goals, and they need different lighting.
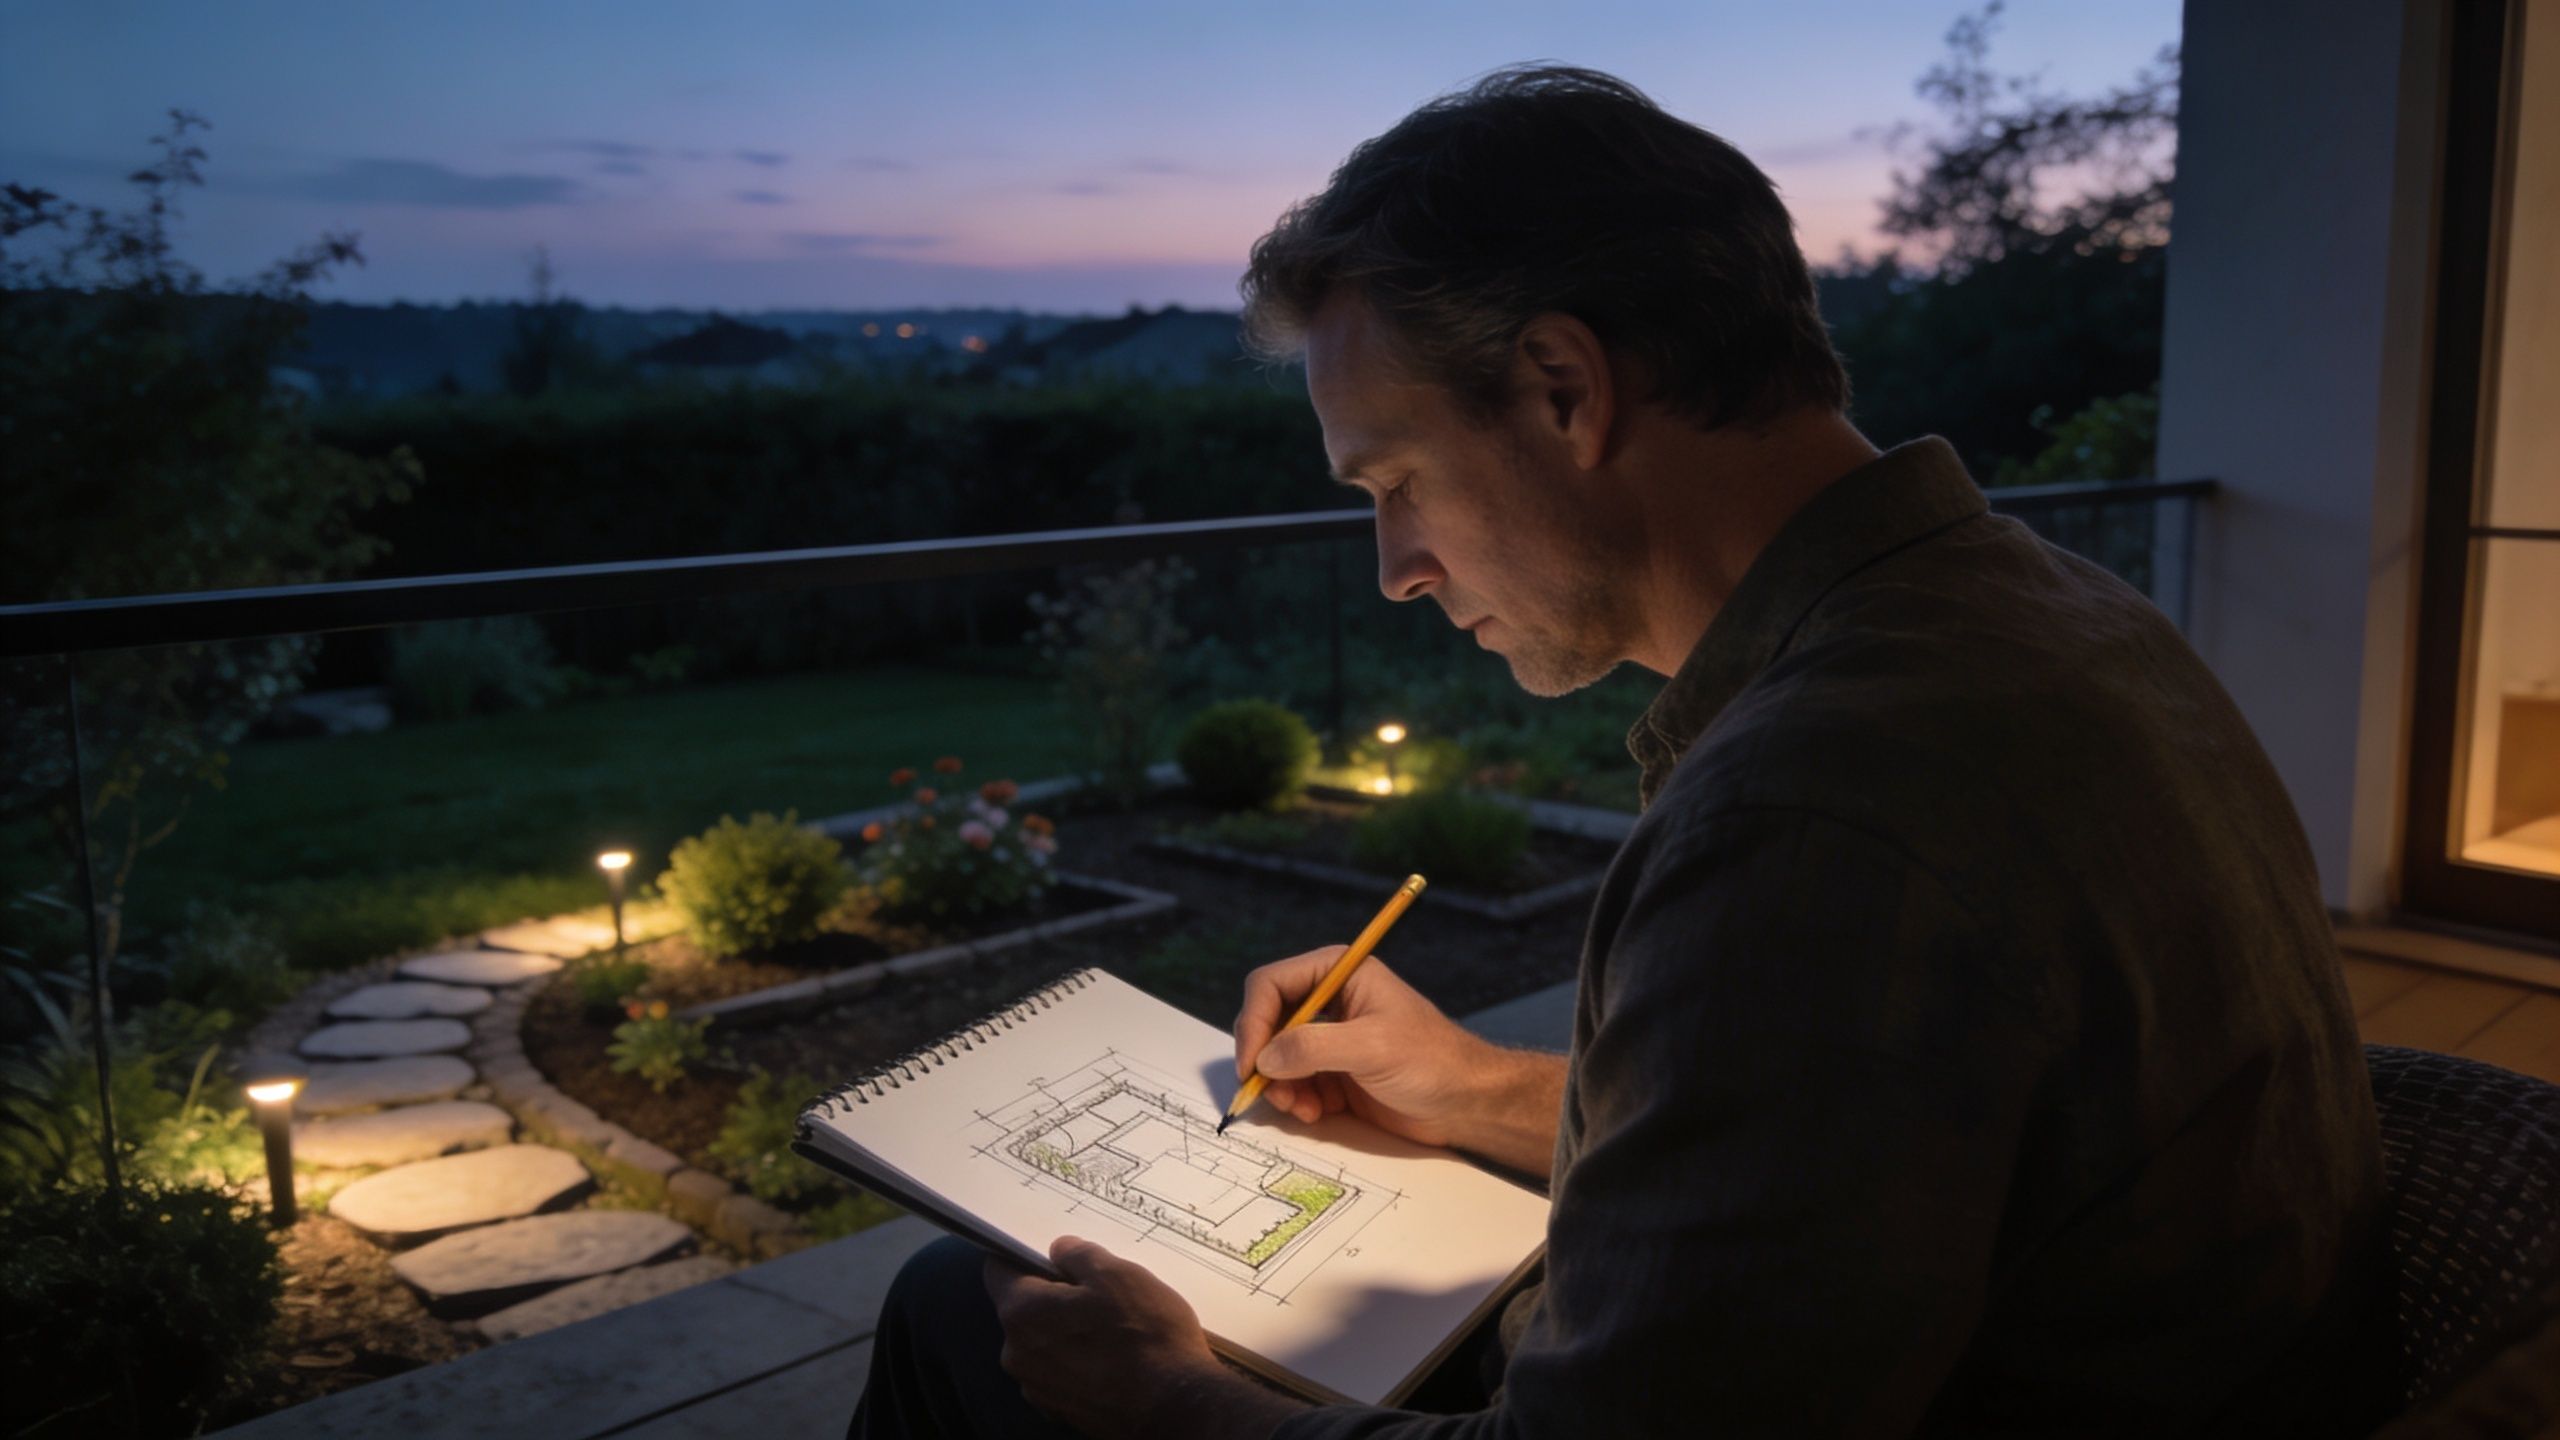
The easiest way to get clarity is to divide the property into use zones.
When homeowners skip this step, they often end up with a yard full of disconnected bright spots. You can tell fixtures were purchased one category at a time rather than composed as a scene.
Smart home planning changes the conversation. Instead of asking which lights should be installed, ask which scenes the property needs.
A useful outdoor lighting plan often includes scenes like:
| Scene | What it does |
|---|---|
| Welcome home | Illuminates the drive approach, entry walk, and front door with a clean, readable look |
| Dinner on the patio | Pulls brightness back around seating and dining areas so faces are visible but the space stays relaxed |
| Evening unwind | Leaves only the soft layers on, with accents on trees or architecture |
| Late night | Keeps minimal wayfinding light for safety without lighting the whole yard |
A yard doesn't need uniform brightness. It needs the right light in the right places, at the right time.
If you're also thinking seasonally, it helps to look at examples outside the usual outdoor lighting conversation. For homeowners who want inspiration for temporary exterior effects, find holiday lighting in Colorado Springs for ideas on how lighting can support curb appeal and occasion-based scenes without overwhelming the home.
For properties where lighting needs to work with audio, shades, voice control, and the rest of the house, landscape lighting design services are usually the point where the plan gets more coherent. The important part isn't adding complexity. It's deciding what the home should do after dark before anyone starts digging.
A polished exterior system starts to look expensive at night for a simple reason. The fixtures disappear, and the light does the work.
Homeowners often shop by fixture label and miss the part that shapes the result. Beam angle, glare control, color temperature, shielding, and adjustability matter more than whether a box says path light or spotlight. I see the same problems over and over. A narrow beam aimed at a wide stone wall. An exposed LED source visible from the patio. A bright fixture near the front walk that reads harsh on its own but still leaves the entry uneven.
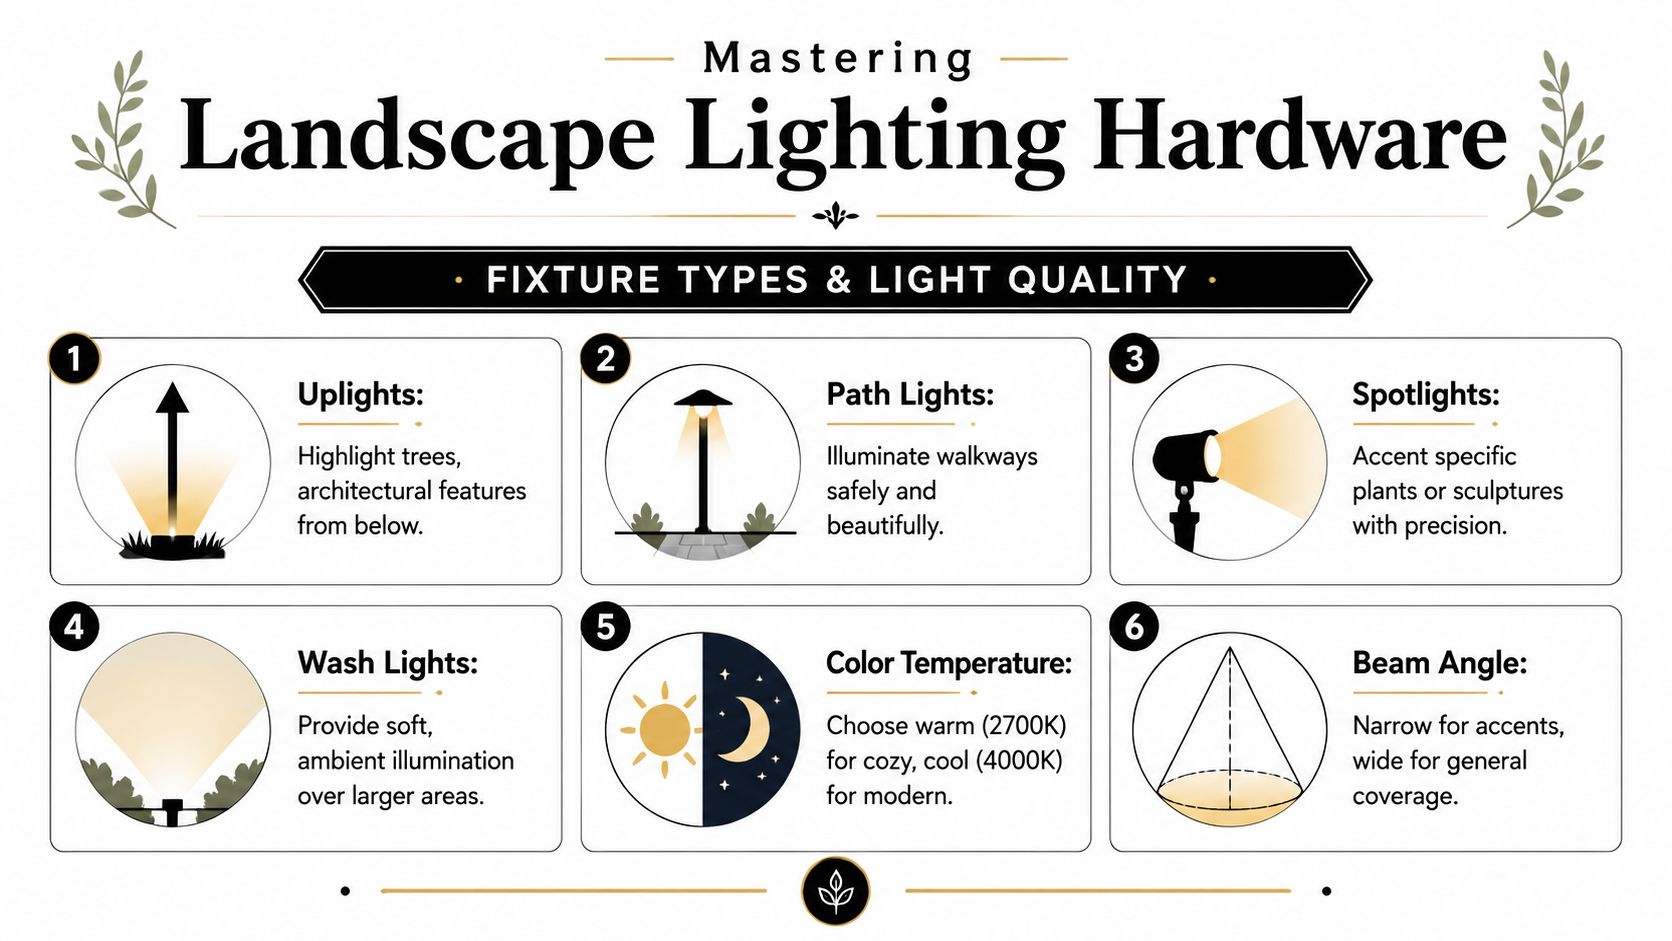
Good design uses a small group of fixture types with clear assignments.
Consistency comes from color, finish, beam control, and placement. It does not come from using one fixture everywhere. That is how many DIY kits end up looking flat.
On integrated projects, fixture choice also affects control performance later. If one area needs a soft 2700K glow and another needs a tighter, cleaner accent, those zones should be selected with dimming behavior in mind from the start. That is one reason we often plan the hardware alongside the Lutron lighting and control system design instead of treating controls as an afterthought.
A few specs tell you almost everything you need to know, if you read them correctly.
| Lighting factor | What it changes | What usually works |
|---|---|---|
| Color temperature | Mood and visual character | Warmer light usually feels better around seating, entries, and dining areas. Cooler light can read sharper on modern architecture but gets clinical fast if overused |
| Beam spread | Focus versus coverage | Narrow beams isolate a trunk, column, or art piece. Wider beams create softer coverage across larger surfaces |
| Output | Perceived brightness and balance | Use enough light to define the subject and the route. Stop before the fixture itself becomes the brightest thing in view |
Glare control is the part many homeowners underestimate. Shielding, aiming, and mounting height matter as much as lumen output. The Lumens outdoor lighting guide makes the same point in different terms. People respond to the effect of light on a surface, not to a visible diode in their line of sight.
Hide the source whenever you can. People should notice the tree canopy, stone texture, or walkway. They should not be looking into the lamp.
Some choices look minor on paper and make a major difference after dark.
What works
What creates problems
The best results come from layering. Soft wayfinding below. Selective accents above. Controlled brightness near doors, stairs, and gathering spaces. That mix gives the control system something useful to work with later, whether the command comes from a keypad, an app, or a simple Josh.ai voice request.
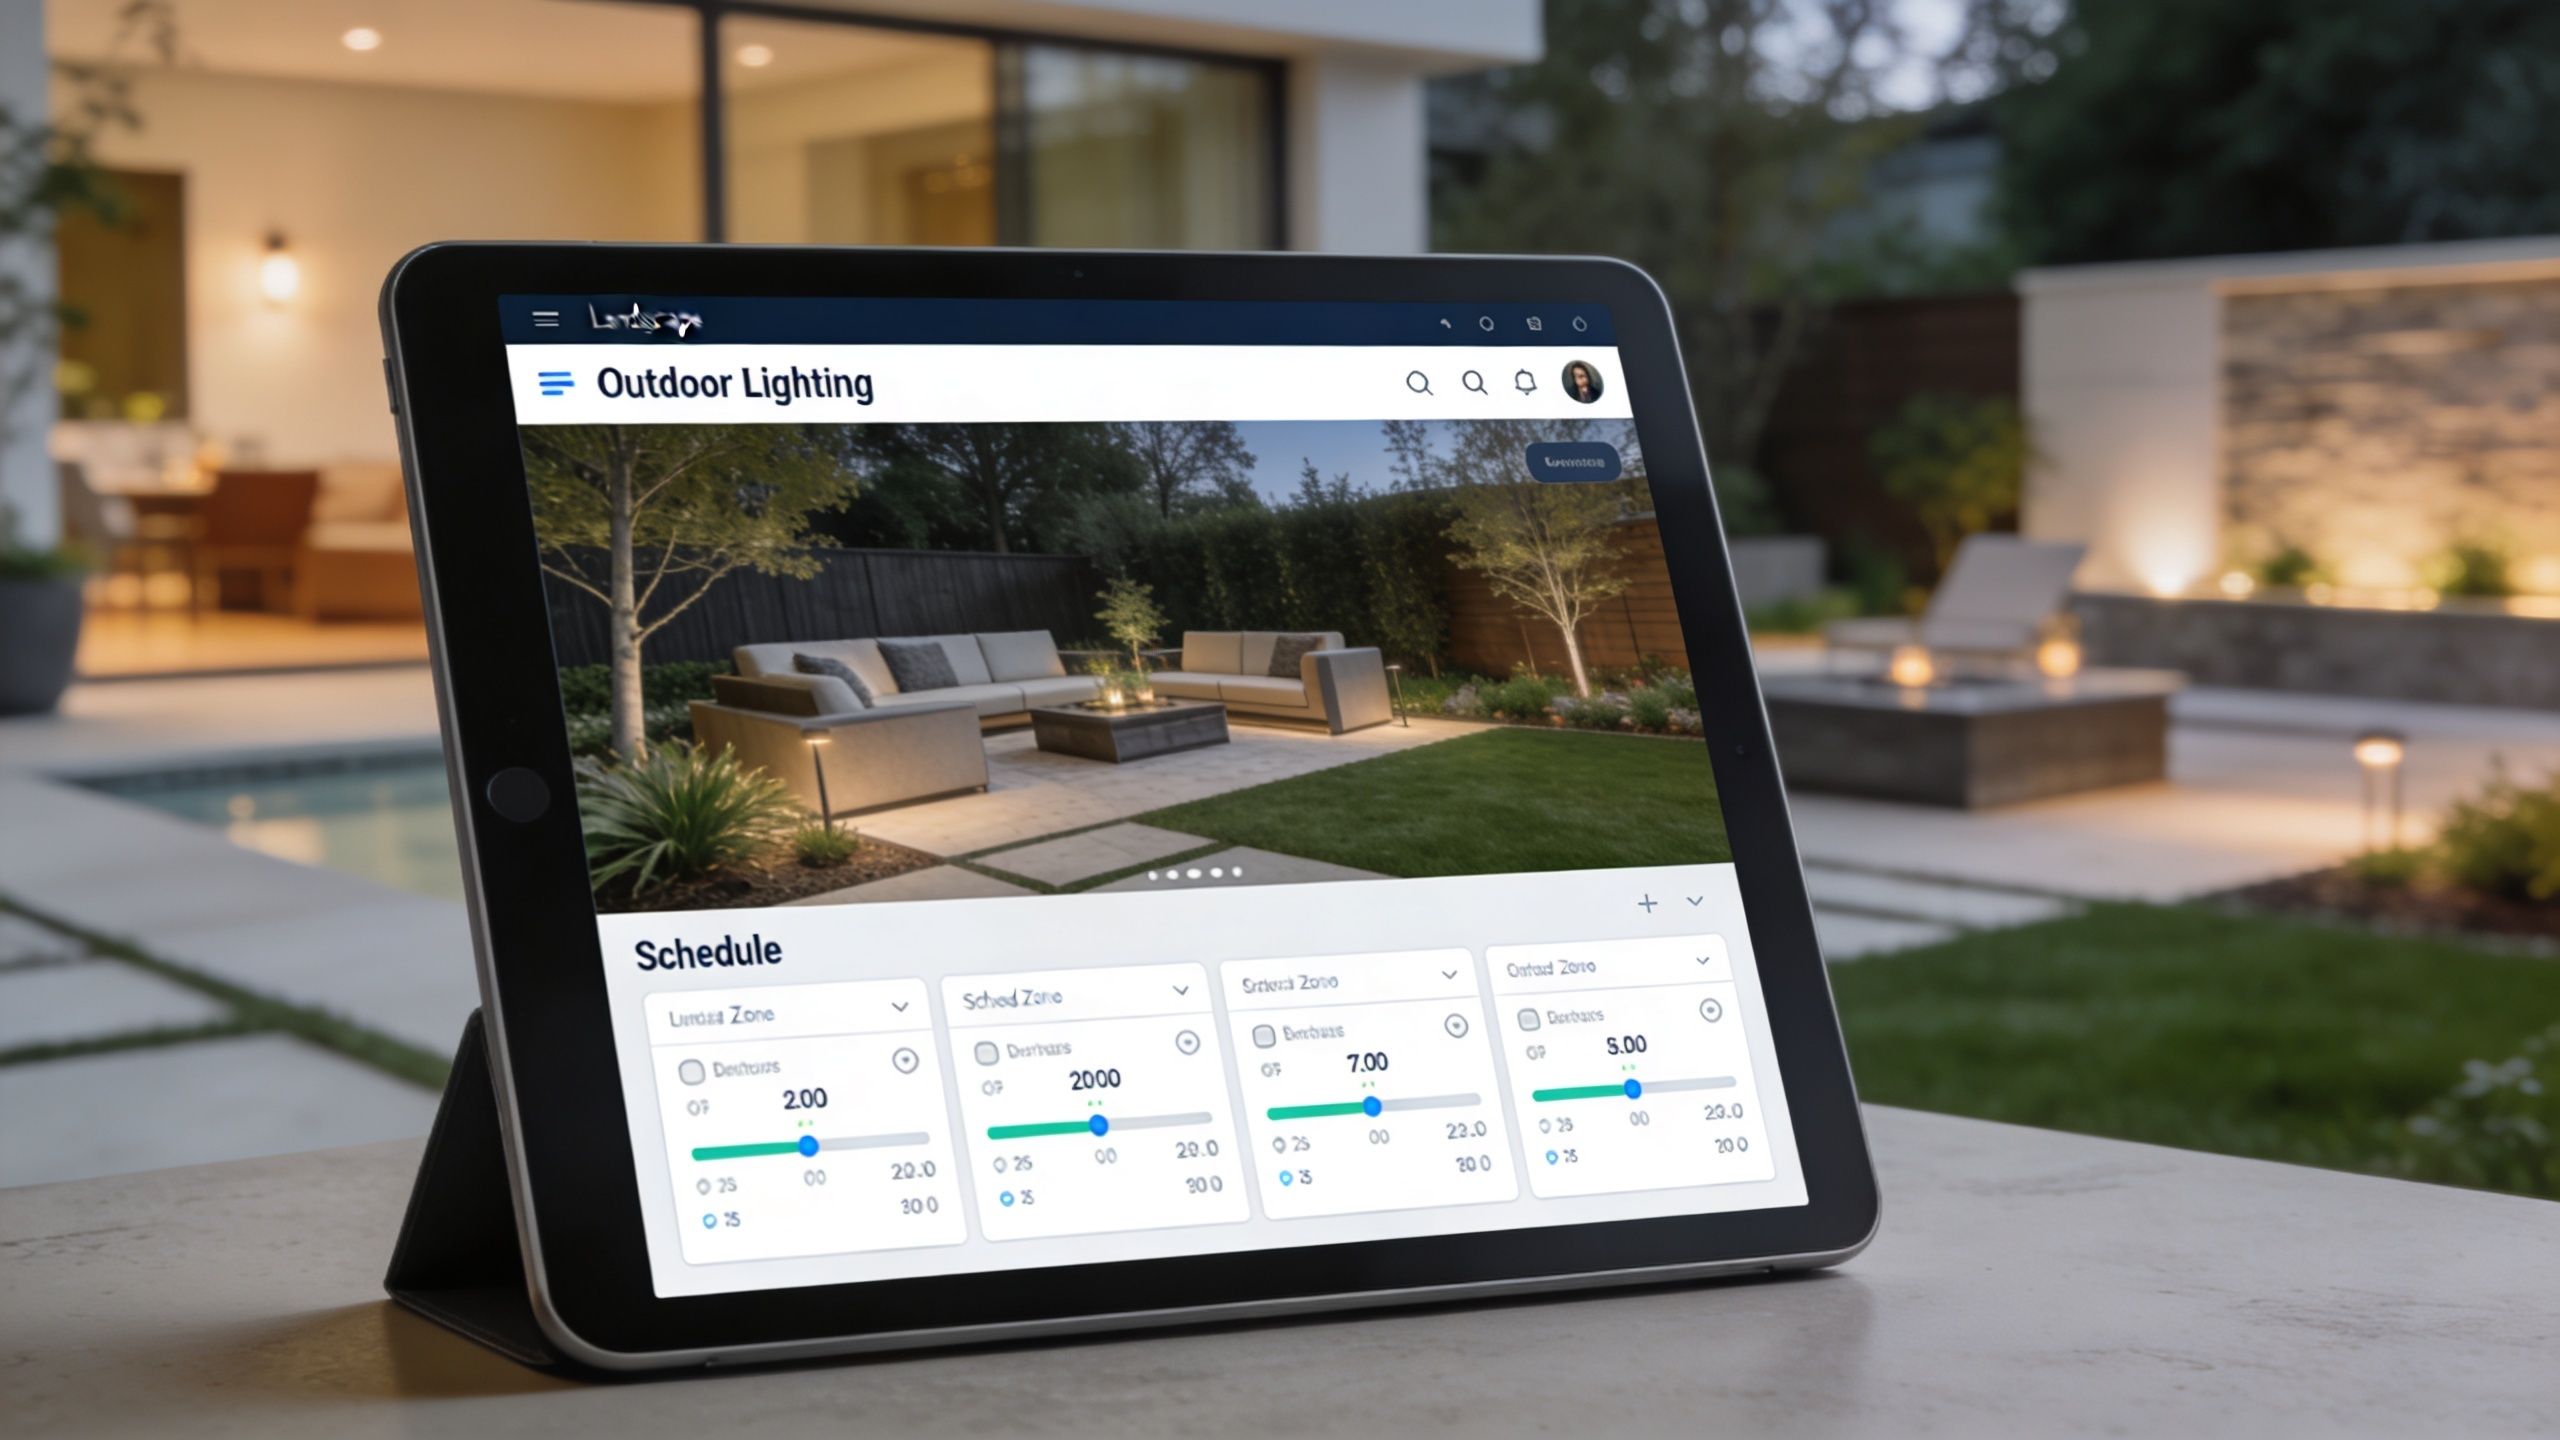
The biggest difference between a basic outdoor lighting system and a smart home lighting system isn't the fixture. It's the control layer.
A timer can turn lights on. An app can switch a zone off. That's useful, but it's still fragmented. A professionally integrated system treats outdoor lighting as part of the same experience as indoor lighting, motorized shades, distributed audio, surveillance, and entry. That's where platforms like Lutron and Josh.ai change the outcome.
DIY control usually breaks down in predictable ways. People create too many disconnected apps, family members don't remember which schedule controls what, and nobody wants to troubleshoot the yard from a phone every time sunset shifts.
A dedicated control platform solves that by making outdoor lighting part of the home's daily logic.
With Lutron lighting control options, homeowners can centralize lighting behavior and tie outdoor zones into the same control experience they use inside the house.
The true benefit isn't novelty. It's usability.
Say you host friends on the patio. One command can dim certain outdoor layers, keep path lighting readable, leave architectural accents on, and coordinate with Sonos outdoor audio so the environment feels finished. If you arrive home late, a voice request through Josh.ai can bring up an arrival scene without lighting every corner of the property. If you're watching a movie indoors on Kaleidescape or using a dedicated theater space, exterior entry paths can stay softly lit while entertaining zones remain subdued.
That kind of integration is what separates a connected home from a collection of smart gadgets.
Here's a useful visual example of the control mindset in practice.
Outdoor lighting rarely lives alone on higher-end homes.
It often needs to coexist with Oelo permanent holiday lighting, Ubiquiti networking for stable outdoor connectivity, cameras and doorbells, gate or garage logic, and indoor lighting scenes that carry through glass walls to exterior entertaining spaces. In that environment, reliability matters more than feature count.
Good control disappears into daily life. If the homeowner has to think about the technology every evening, the system wasn't planned well enough.
For homeowners building new or renovating, this integrated approach is usually easier to implement early. The same team coordinating home audio, theater, automation, and low-voltage infrastructure can plan the outdoor control layer so the lighting feels native to the house from day one.
A polished outdoor system can still disappoint at night if the power and wiring plan was treated like an afterthought.
I see this on larger homes all the time. The fixtures are attractive, the control app looks impressive, and the first walkthrough feels promising. Then the far end of a path reads dimmer than the entry court, one zone behaves differently after a few months, or adding a few fixtures later turns into a bigger retrofit than anyone expected. Those problems usually start on paper.
Good technical planning starts with a scaled sketch of the home, hardscape, planting beds, trees, and key activity areas. Then mark fixture locations, transformer locations, and cable routes before any trenching begins. VOLT Lighting's planning guide is a useful reference for this step, especially its advice on grouping fixtures by similar run length to help manage voltage drop.
That matters more on integrated homes.
If the front walk, motor court, pool terrace, and rear entertaining areas will live on different Lutron scenes or Josh.ai voice commands, the wiring plan should reflect those use cases from the start. A homeowner should be able to call up an arrival scene, a late-night pathway scene, or an entertaining scene without forcing unrelated areas onto the same electrical run just because it was easier during installation.
Transformer sizing should stay conservative. A system that is already close to capacity on day one leaves little room for seasonal changes, fixture upgrades, or future additions around a gate, sports court, or outdoor kitchen.
In practice, we plan for expansion.
That is especially important on homes where exterior lighting is part of a larger automation package. Once clients see how useful scheduled scenes and voice control are, they often want to extend coverage to side yards, driveway edges, specimen trees, or architectural details that were not part of phase one. A little spare capacity up front is cheaper than replacing equipment later.
The right cable topology depends on the property shape, run lengths, and how tightly you need fixture output to match from one area to another. The three common low-voltage approaches are daisy chain, T-method, and hub method.
Here is the practical trade-off:
| Wiring method | Strength | Trade-off |
|---|---|---|
| Daisy chain | Simple to install on straightforward runs | Output can vary more when fixture distances change a lot |
| T-method | Works well when one run needs to split into two directions | Branches need to stay balanced |
| Hub method | Gives tighter control from a central distribution point | Uses more cable and takes more planning |
For homes with layered control and multiple scene types, hub-style distribution often gives the cleanest long-term result, even if material and labor costs are higher. It is easier to service, easier to document, and easier to integrate cleanly with centralized equipment locations.
If you want the installation details behind routing, splicing, burial depth, and transformer connections, review our guide on how low-voltage lighting is wired.
The fixture gets the attention. The wire plan decides whether the system looks consistent, stays serviceable, and responds properly inside a larger smart home.
The difference between a yard that feels custom and one that feels like a weekend project shows up after dark. It shows up in what you do not notice. No glare in your eyes, no visible wires, no rows of identical dots marching down a walk, and no bright fixture stealing attention from the architecture.

Path lights are easy to overdo.
Rigid left-right symmetry usually makes a walkway feel commercial. A better approach is to stagger fixtures so the pool of light leads you forward without putting every source on display at once. The spacing depends on beam spread, mounting height, and the surface you are lighting, but the visual goal stays the same. Guide movement, do not outline every inch of the path.
That matters even more on integrated systems. If the home uses Lutron scenes or Josh.ai voice control, each zone should still look restrained at full output and balanced when dimmed for evening entertaining. Good placement gives you that range. Poor placement locks you into one look, and it is usually too bright.
Daytime placement gets the fixture in the ground. Night aiming creates the finished result.
I adjust fixtures from the actual viewing positions that matter. The front approach, the patio chairs, the kitchen window, the driveway turn. A small change in angle can soften a hot spot on stone, keep a lamp out of sight from a seating area, or pull more texture from a wall without blasting it.
Three details separate clean professional work from a fast install:
Uplighting often fails because the fixture sits too close to the subject. That creates a bright trunk and very little depth.
Trees usually look better when the beam has enough distance to catch structure, branching, and canopy instead of blasting one narrow area. The same principle applies to stone columns, specimen planting, and façade accents. Step the fixture back, test from the main viewpoints, then fine-tune. The property should look layered, not spotlighted.
For integrated projects, that restraint pays off later. A tree that looks balanced at full brightness will usually dim well inside a Lutron scene, and Josh.ai commands like “turn on evening exterior” will trigger something that feels intentional instead of harsh.
If you are comparing installers, ask how they handle after-dark aiming, concealment, and future service access. Those answers usually tell you whether you are getting a thoughtful system or just fixture placement. If you want to vet the installation side more closely, review what low-voltage wiring contractors near you should include in scope before the first fixture goes in.
An outdoor lighting system isn't finished when the lights come on for the first time. It's finished when the property looks balanced from the street, from the patio, and from inside the house looking out.
That final tuning pass matters because outdoor spaces change. Plants fill in, mulch levels shift, outdoor furniture moves, and what looked centered in daylight may produce glare at night. The best approach is a night audit. Walk the paths, sit in the seating areas, stand at the curb, and look from the windows you use most. Check for dark gaps, exposed sources, and spots that pull too much attention.
Use a short checklist rather than relying on memory.
Outdoor lighting should get quieter as the evening goes on. If the system becomes more noticeable than the space itself, it needs adjustment.
The reason a well-designed system holds up is that each layer supports the others. The fixtures are chosen for effect, the wiring is planned for consistency, the controls are easy to live with, and the final aiming respects how the property is used after dark.
That's also why professional integration makes sense on primary homes. The same discipline that goes into residential audio, automation, networking, and theater design applies outside. When the lighting is tied into the rest of the home, it becomes part of the nightly routine instead of another standalone system to manage.
If you're in southern Wisconsin or northern Illinois and want a residential outdoor lighting plan that fits the architecture, the yard, and the smart home around it, Home AV Pros can help map the system, integrate control, and fine-tune the final result so it feels like part of the home from day one.

Copyright © 2026. Home AV pros. All rights reserved.